Module 2: Data Profiling
Data Profiling and Generating Mappings
Key Terms
-
Data profiling involves analyzing the data from your data sources to understand its structure, quality, and characteristics. This process helps in identifying the tables, schemas, and detailed information about your data.
-
Entities: Entities are higher-level concepts in data modeling that group together related tables representing a common theme or purpose, such as Customer or Order.
-
Attributes: Attributes are specific data points within an entity, representing common columns across grouped tables, such as FirstName or OrderDate.
In this module, we begin by identifying the structure of incoming data using Schema Scan, followed by Table Profiling, and then use a Large Language Model (LLM) to generate clean, business-friendly entity and attribute mappings. This allows technical and non-technical users to understand and work with the data more effectively.
Step 1: Launch Schema Scan
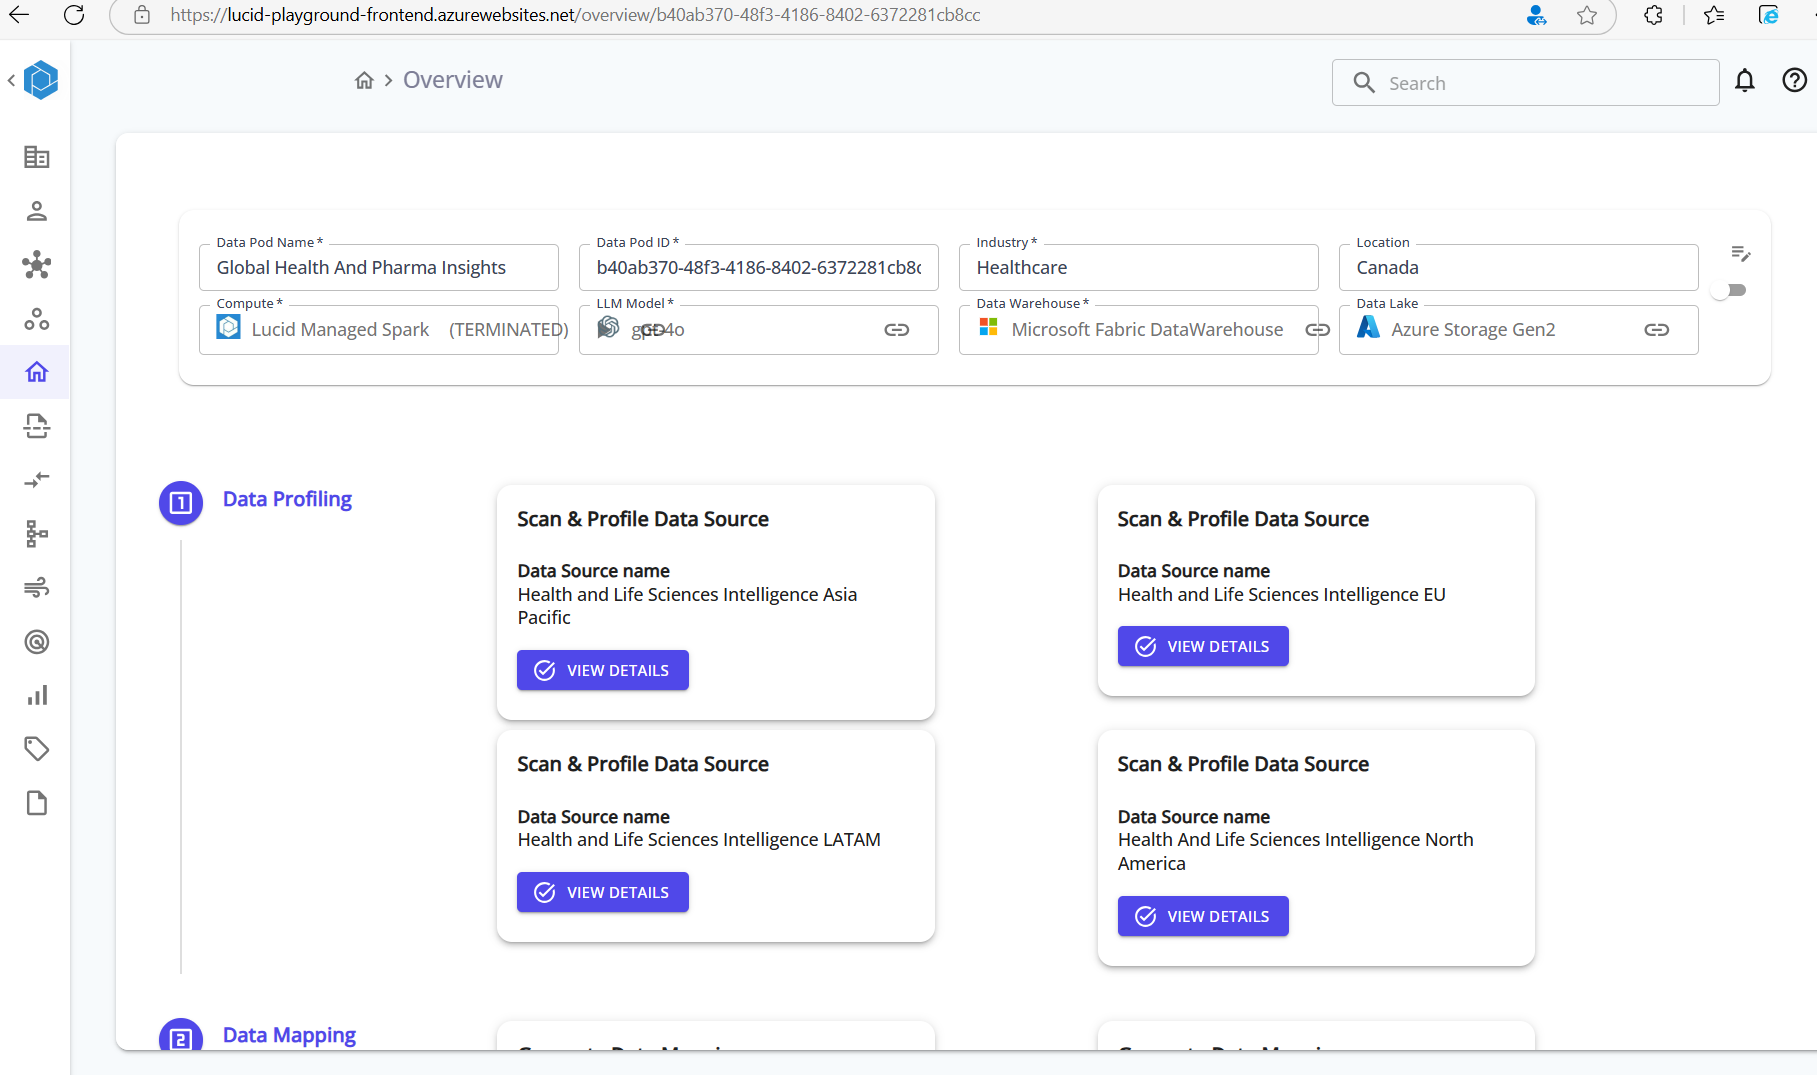
From the Overview screen of a Data Pod, scroll down to the Data Profiling section.
Click View Details on one of the listed data sources.
Step 2: Configure Schema Scan Settings
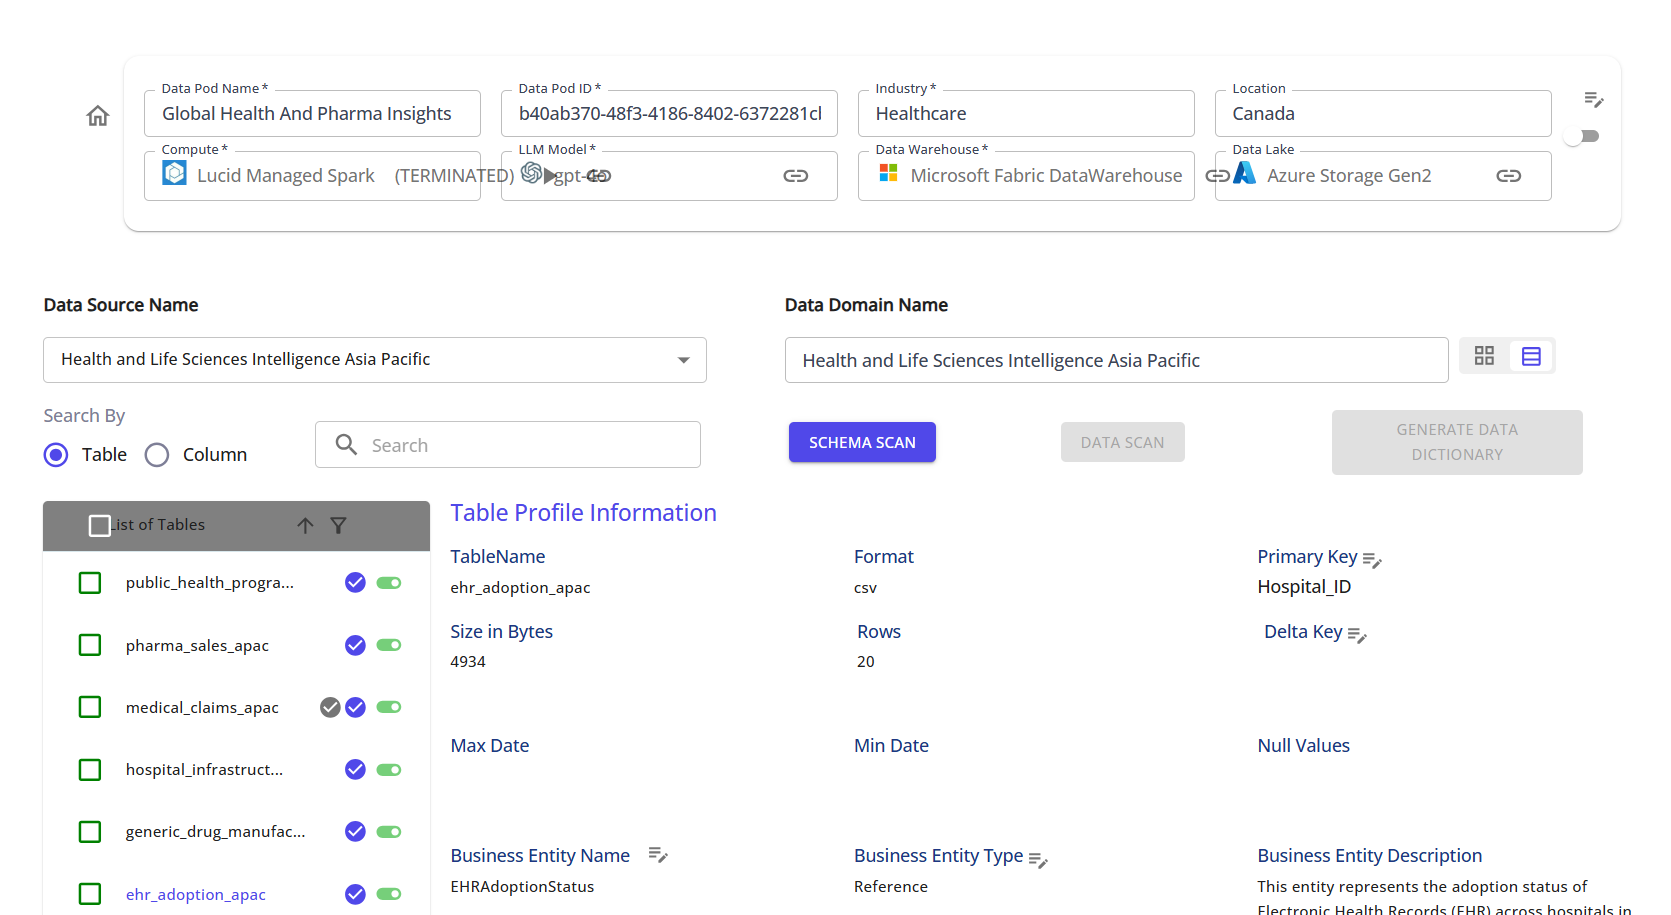
Choose the file format (e.g., CSV, Parquet, JSON, or SQL), folder structure type, and other parsing preferences.
You’ll also need to specify:
- Whether the file has a header row
- The delimiter (for CSV files)
- The folder structure type:
- Each File is a Data File/Table
- Each Directory is a Table
- Nested structures supported
This configuration is crucial for accurately interpreting files from object storage.
Step 3: Provide Data System Context
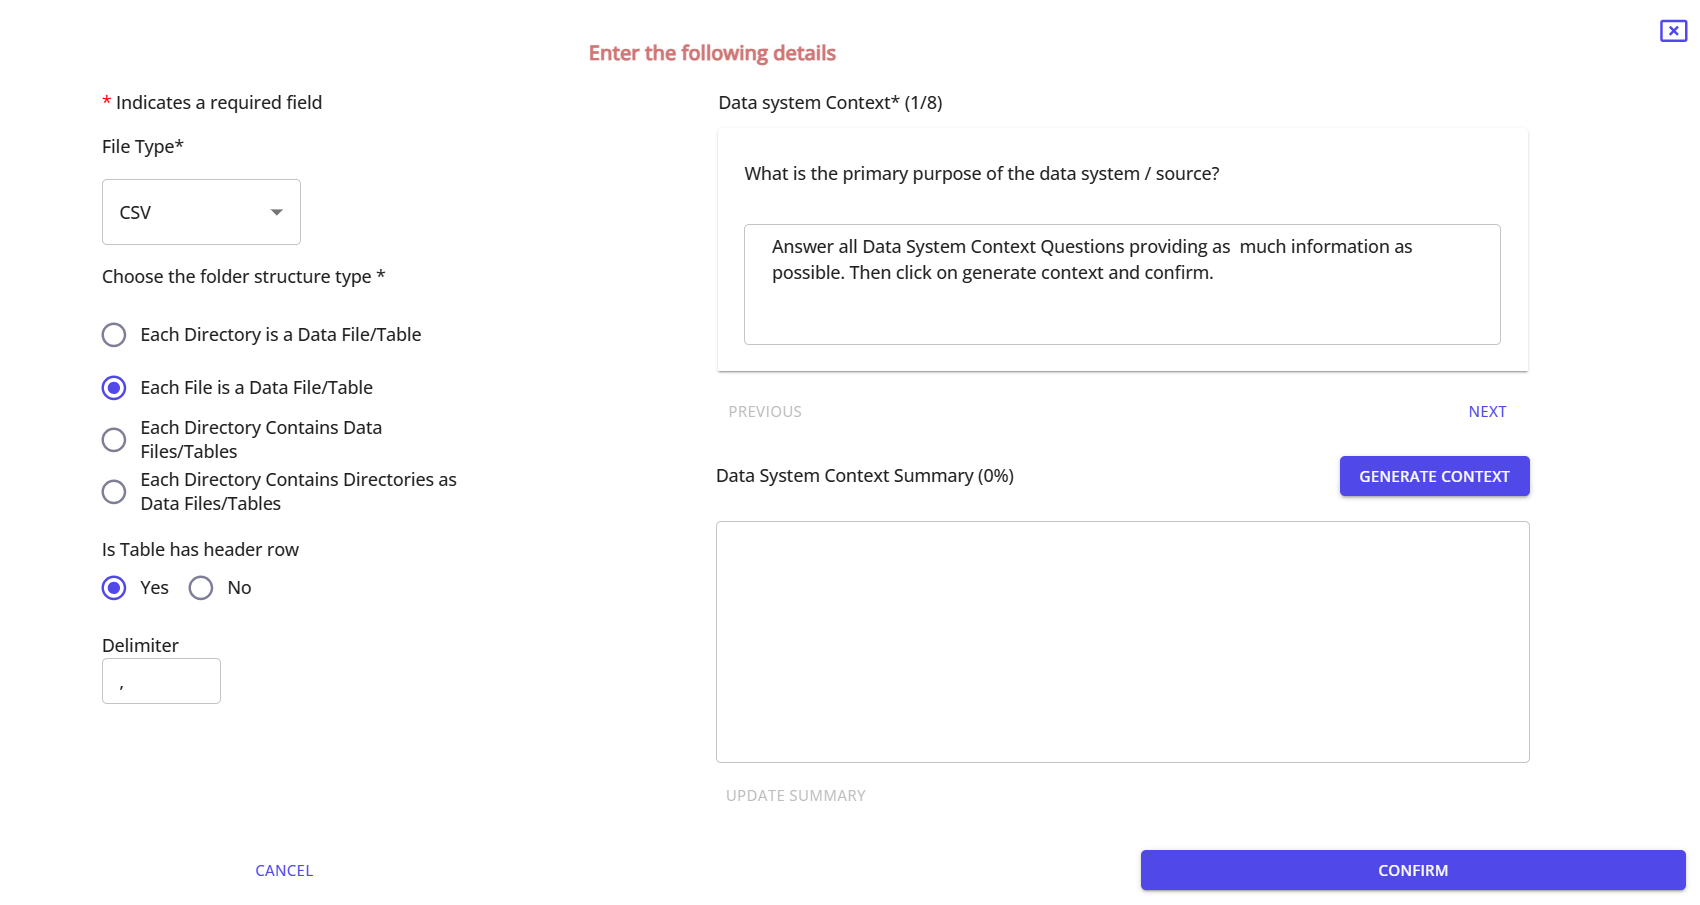
Answer guided questions to provide business context, such as:
- What is the purpose of the data?
- How is the data captured and used?
- What domains or subjects does it relate to?
Click Generate Context to create a summary. This step enriches the LLM-generated mappings later.
Step 4: Run Schema Scan
Once configured, click the SCHEMA SCAN button.
This reads metadata from your source files and populates basic structural information such as:
- Table and Column Names
- Data Types
- File Format and Size
- Row Counts
Step 5: Explore Table Metadata (Table Profiling)
After the schema is scanned, you can dive into Table Profiling.
Click on any table from the list to view:
- Table size, row count, format
- Primary Key, Delta Key
- Min/Max Dates
- Null value checks
- Business Entity Name & Type
- Business Entity Description
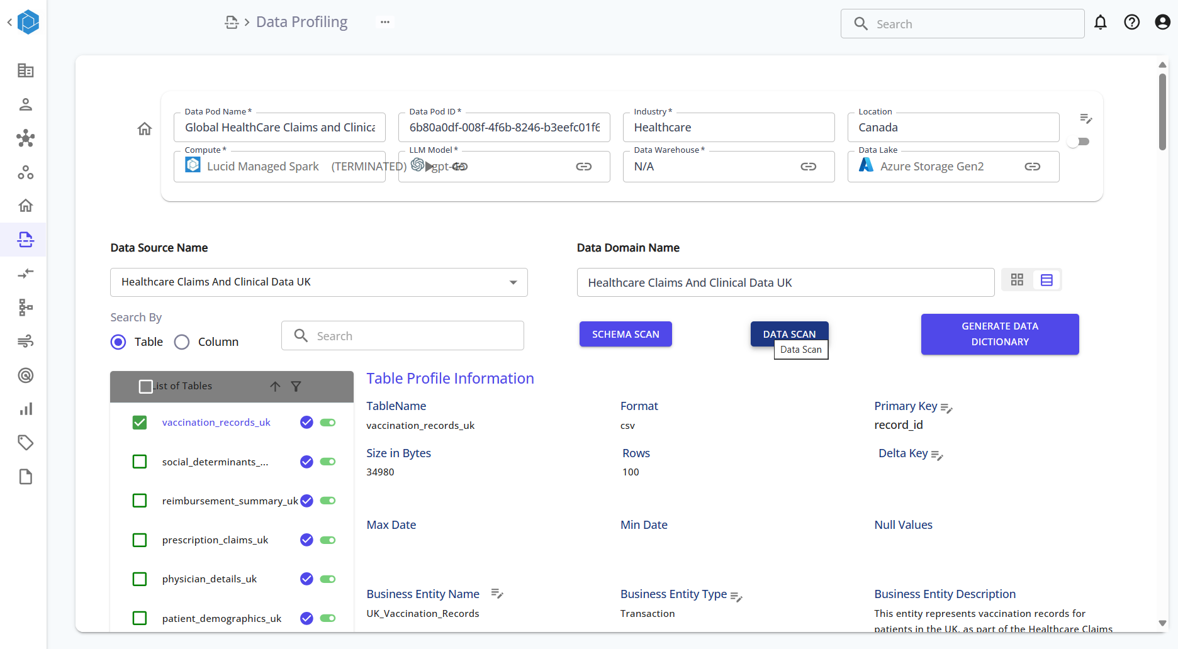
This helps understand data completeness, structure, and business meaning.
Step 6: Generate Mappings (LLM-Powered)
Now that the metadata is collected, the platform uses LLM to:
- Suggest a Business Entity Name (table name)
- Suggest Attributes (column names)
- Auto-fill Entity Descriptions, Business Classifications, and Data Types
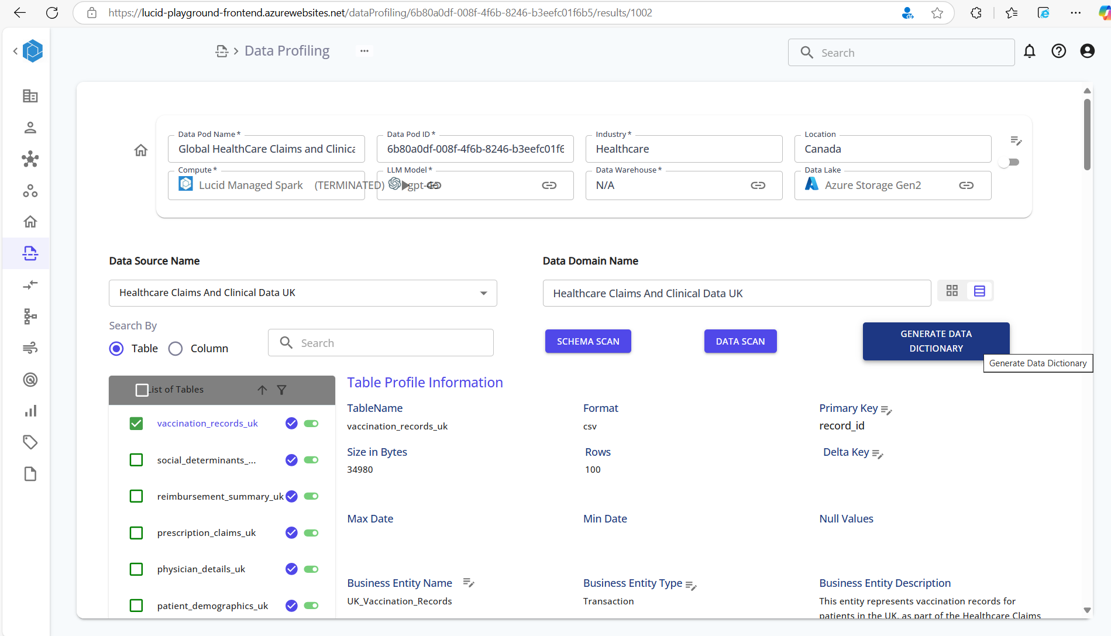
This step converts raw technical schema into human-readable business-friendly format.
Step 7: Review & Edit Mappings
After mappings are generated, you can:
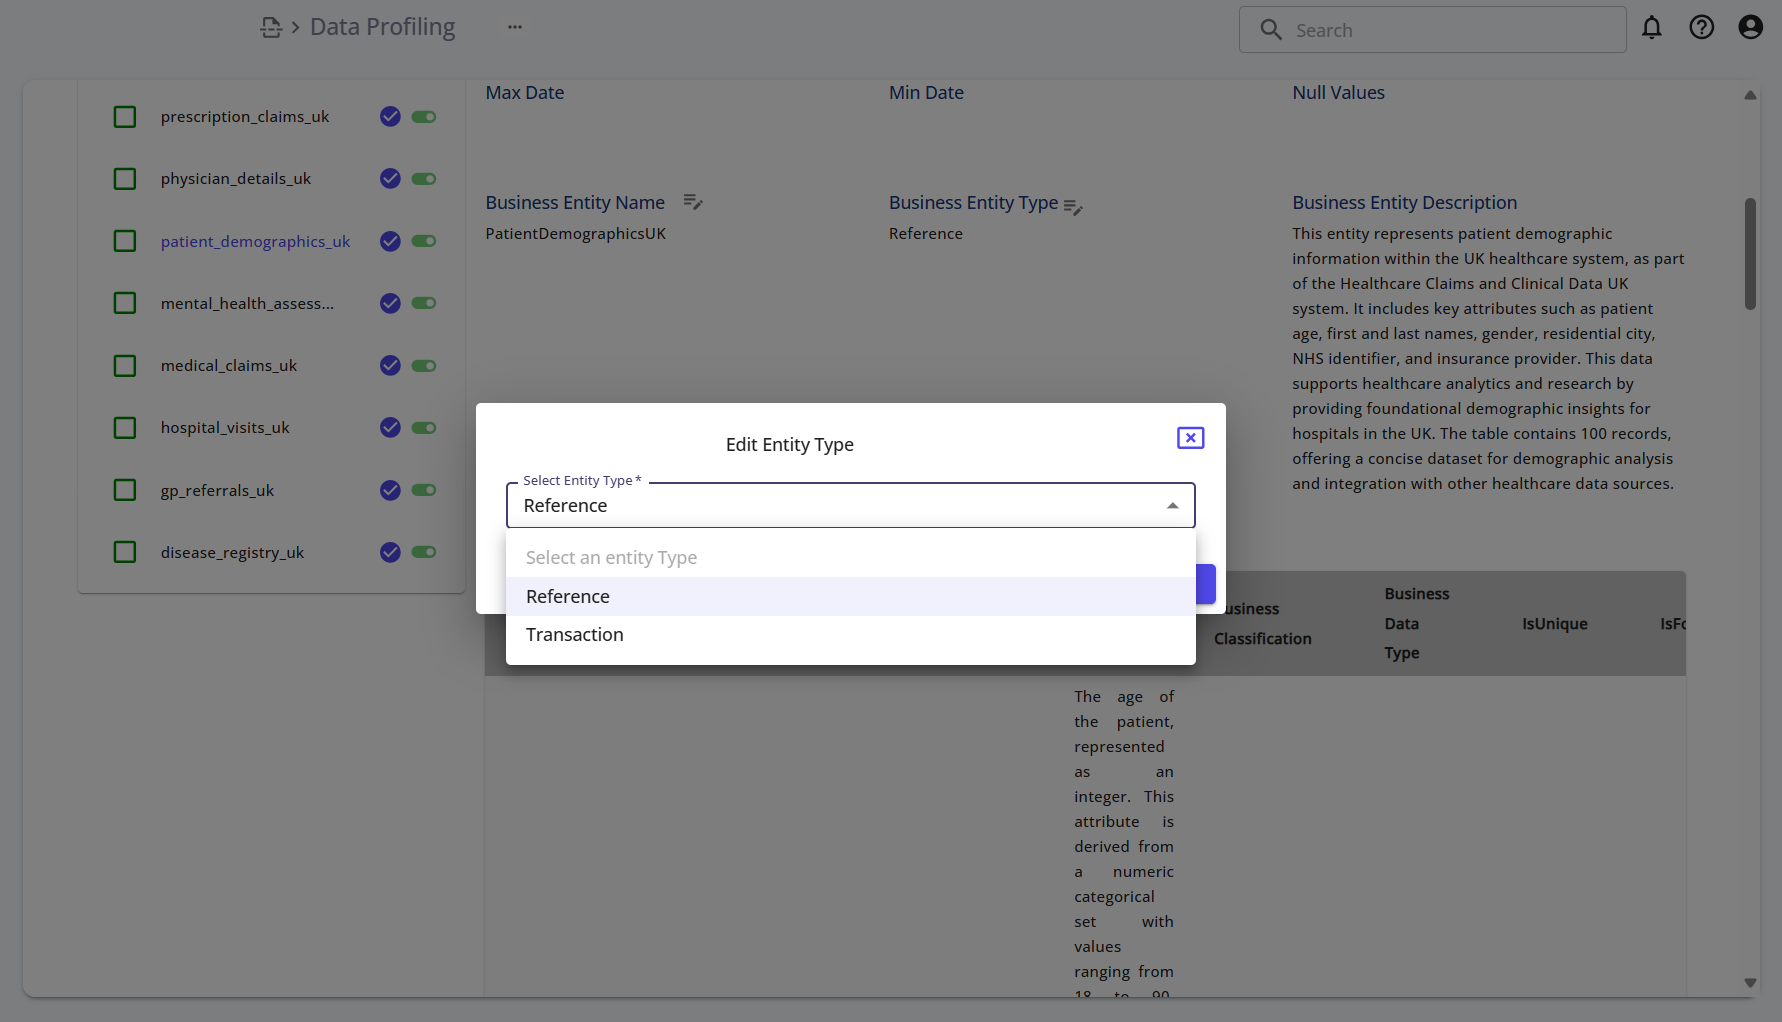
- Edit Entity Type – choose
ReferenceorTransaction - Edit Entity Name and Description
- Edit Attributes, including business name, data type, description, classification
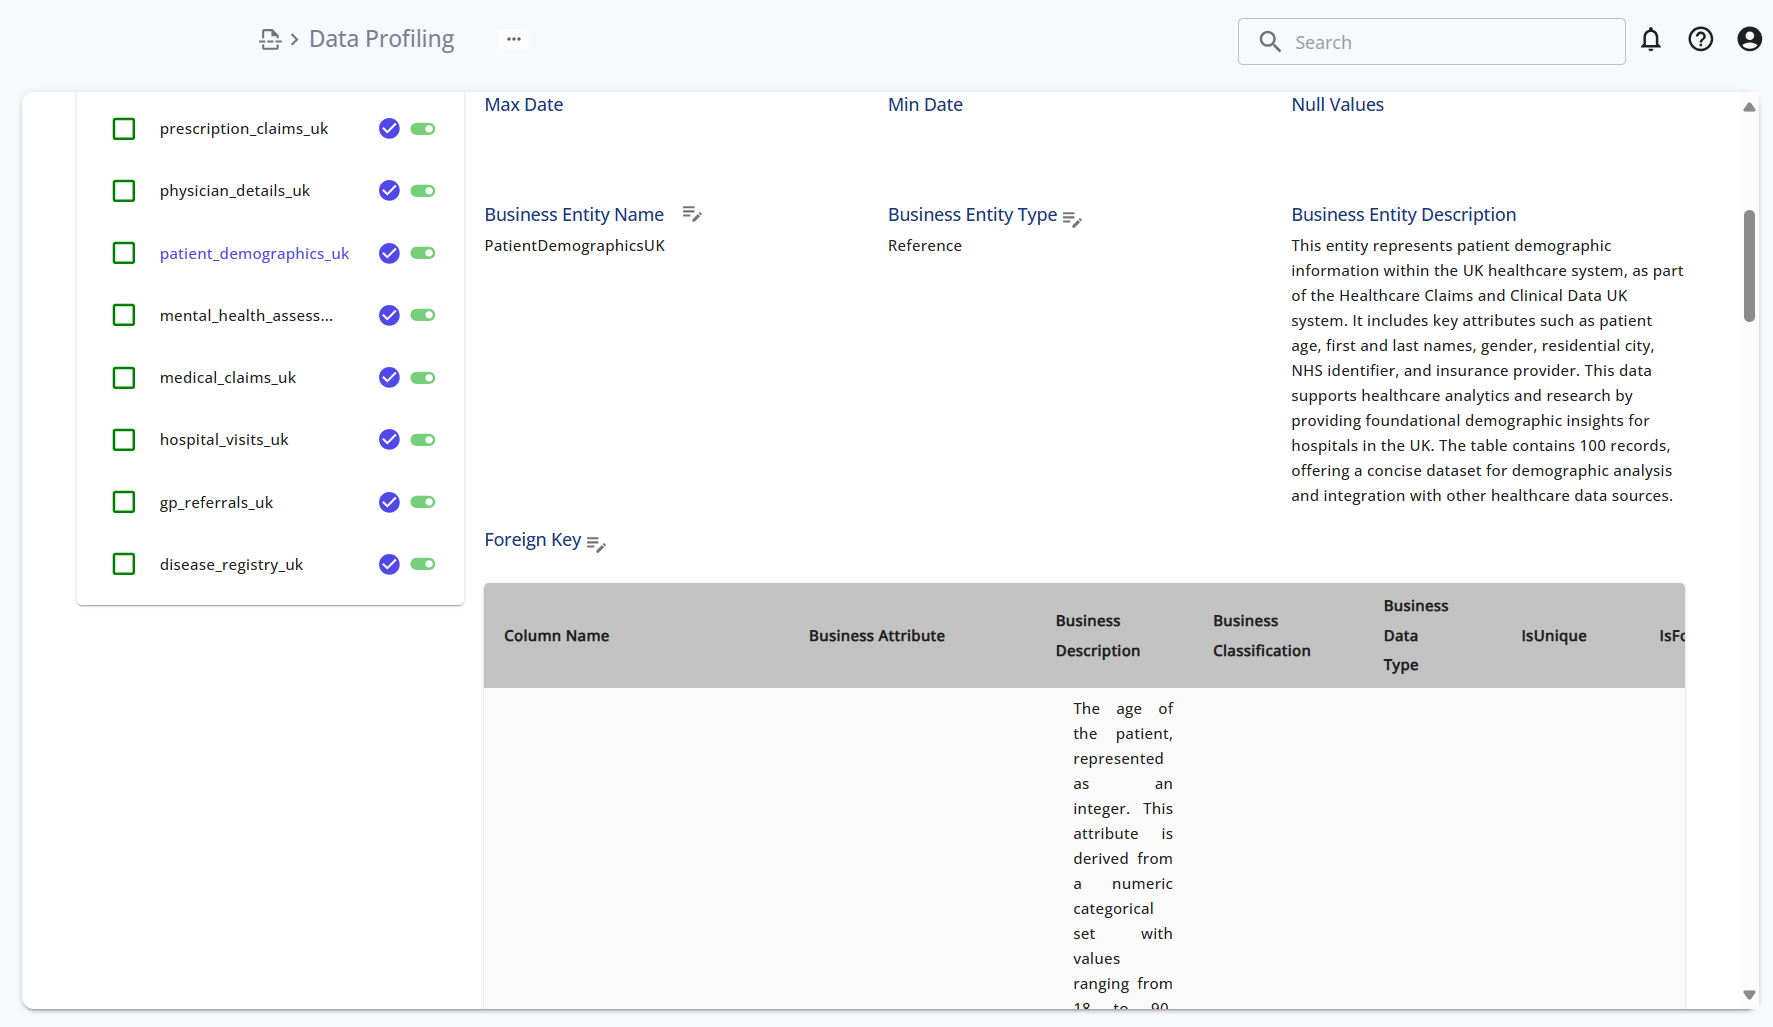
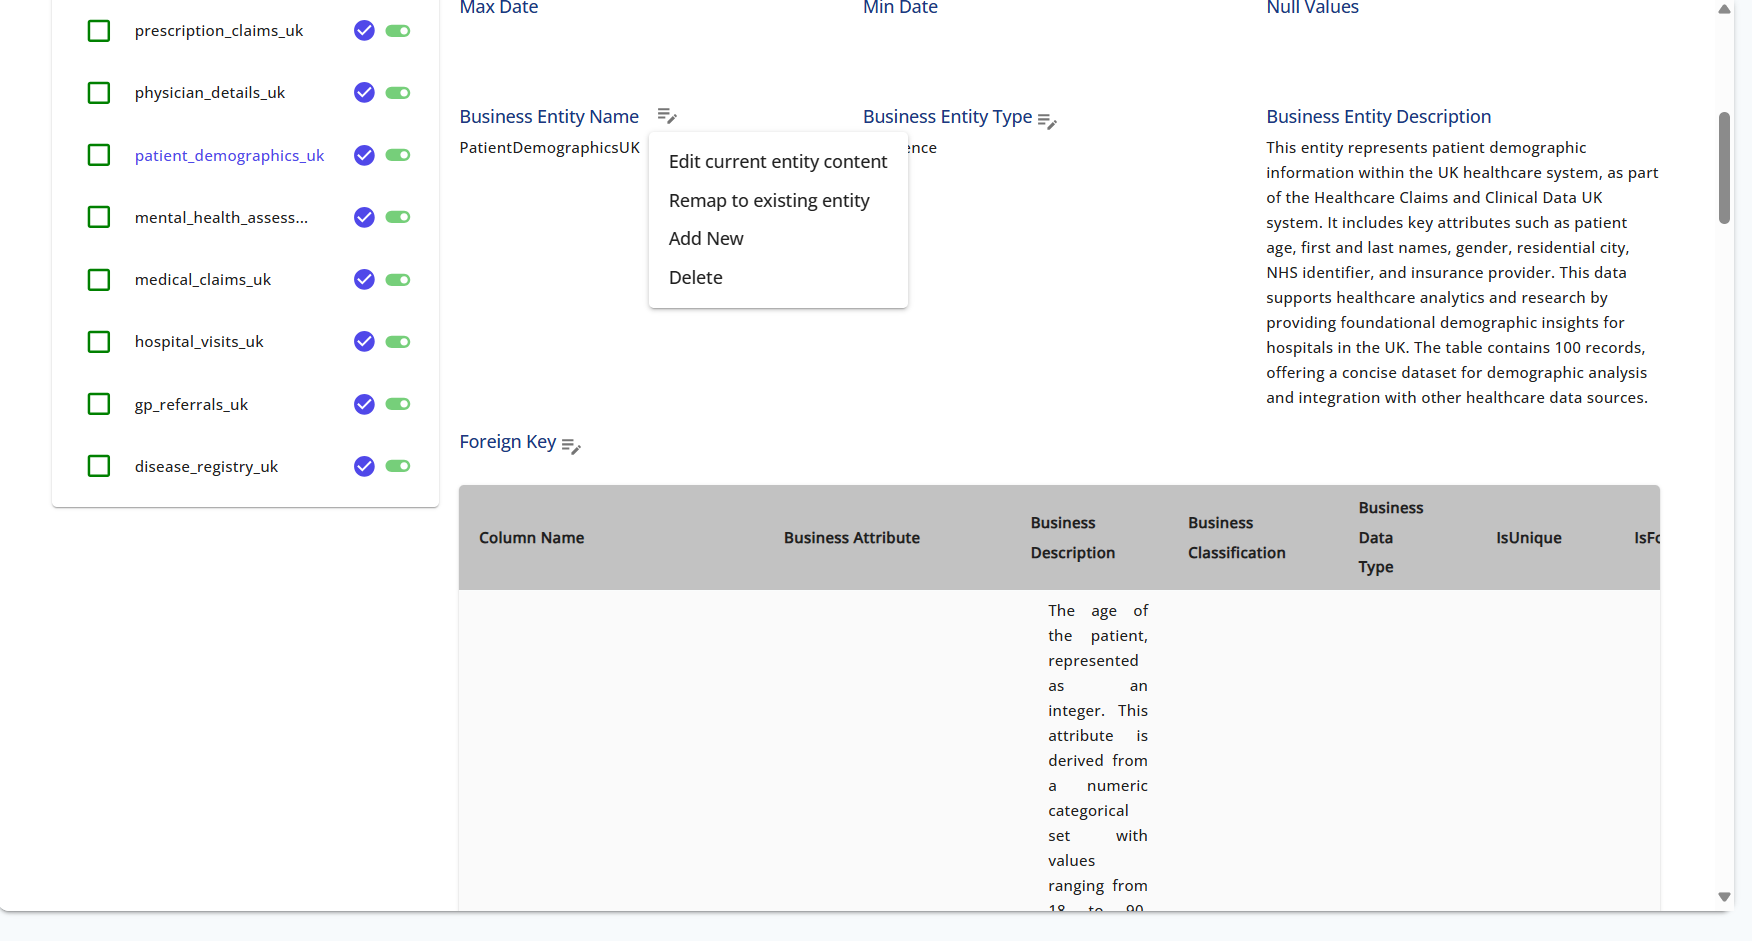
You can also:
- Remap to existing entity
- Add New entity
- Delete unnecessary mappings
Additionally, you can change the Business Entity Type:
-Reference
-Transaction
Summary
This module enables users to:
- Understand the shape and structure of raw source data (via schema scan)
- Enrich datasets with profiling metrics
- Use AI to automatically generate clean, consistent entity and attribute mappings
- Refine those mappings with built-in editing tools
The resulting data model will be used in the next steps for transformation, enrichment, and reporting.