Lucid On-boarding Azure Marketplace
Date: 2024-11-08
Version: 2.0 (Azure Marketplace)
Table of Contents
- Pre-Deployment Steps
- Azure Marketplace Lucid Infrastructure Deployment Steps
- Application Deployment Steps
- Post-Deployment Configuration Steps
Pre-Deployment Steps (Performed By: Customer)
1. Azure Open AI Approval
Create and approve an Azure Open AI Service under the Azure subscription, as it is essential for Lucid’s operations.
2. Azure DevOps Repo / GitHub Repo for Lucid
Create a new repository in Azure DevOps or GitHub. This repository will store the notebooks generated by Lucid.
3. Azure Accounts for Lucid Team
Provide Azure Active Directory (Entra ID) accounts for Lucid consultants to enable access to manage deployment and resources for the Lucid Pilot.
4. Access to Azure Services
Grant access to the following for the Lucid team:
- Azure App Registrations
- Azure Open AI
- Azure DevOps / GitHub Repositories
5. Provide Azure Account Details
Share necessary details with the Lucid Deployment Specialist, including:
- Azure App Registrations
- Azure Open AI
- Azure Accounts
Azure Marketplace Lucid Infrastructure Deployment Steps (Performed By: Customer)
1. Search for Lucid Data Hub
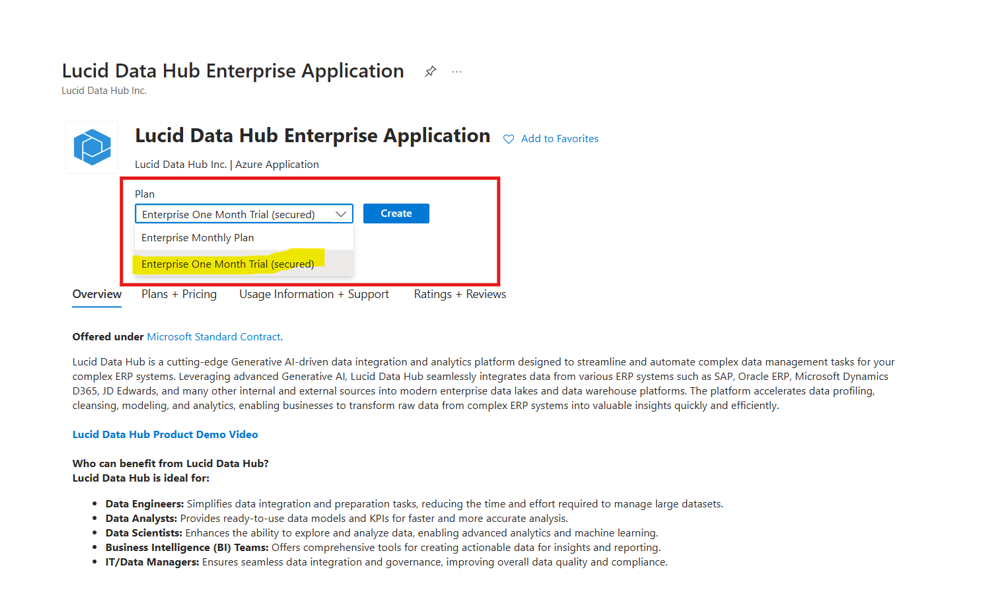
In the Azure Marketplace, use the search bar to enter "Lucid Data Hub". Review the search results and select Lucid Data Hub from the list. Click on Lucid Data Hub to view its details. Review the app description, pricing, documentation, and any available customer reviews to ensure it meets your requirements.
2. Plan
If Lucid Data Hub offers multiple pricing plans, choose the one that best fits your needs. There is a free trial available if you want to evaluate the service before committing.

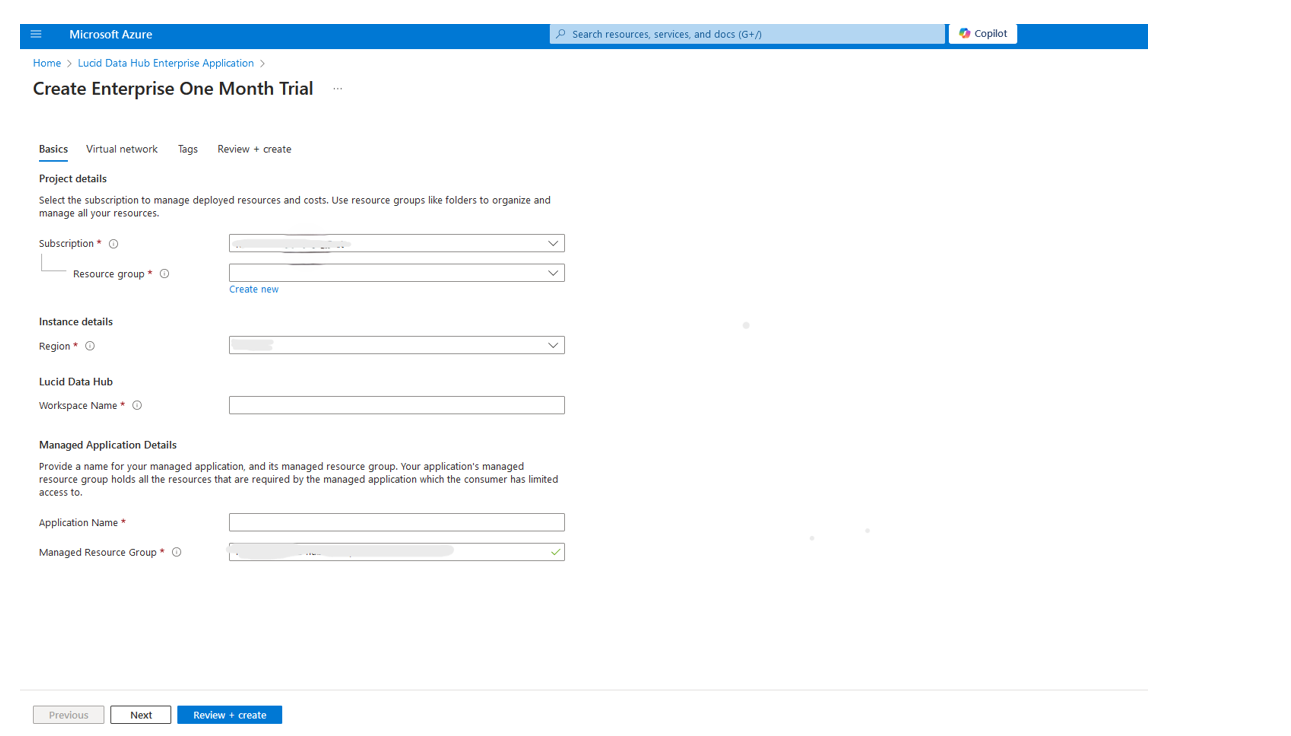
3. Basic Information Configuration
- Subscription: Choose an Azure subscription for billing.
- Resource Group: Select or create a new resource group.
- Region: Choose the desired Azure region.
- Workspace Name: Provide a workspace name.
- Application Name: Provide an application name for resource management.
- Managed Resource Group: Create a resource group for all resources.

4. Virtual Network Configuration
- Virtual Network: Choose or create a virtual network.
- Subnet: Choose or create a subnet within the virtual network.

5. Customer Information
Provide contact information for communication purposes.
6. Create
- Read and accept the legal terms and conditions.
- Review the configuration and pricing.
- Click Create to confirm and finalize your subscription.
7. Validate Lucid Infrastructure Deployment
Confirm successful deployment by:
- Reviewing the status of components in the Lucid Resource Group via Azure Portal.
- Checking deployment logs for errors.
- Verifying security configurations and access controls.
8. Create Azure App Registrations
Create three app registrations:
- LucidApiApp
- LucidReadWrite
- LucidWebAppAuthentication
Attached Terraform scripts can be used for app registration creation.
Application Deployment Steps (Performed By: Lucid)
1. Configure App Registration and Environment Configuration
Use details such as Application ID, Tenant ID, and Client Secret to configure environment variables in CI/CD pipelines.
2. Run Application Deployment CI/CD Pipelines
Trigger the CI/CD pipelines manually or automatically, ensuring necessary build, test, and deployment stages are configured.
3. Validate Application Deployment
- Confirm the success of deployment through CI/CD tools or dashboards.
- Check logs for errors and verify the deployment in the correct environment.
- Document the validation results.
Post-Deployment Configuration Steps (Performed By: Lucid / Customer)
1. Lucid Application Portal URL to Azure AD Redirects
Update the Azure AD Application Registration redirect URIs with the Lucid Application Portal URL. Test the authentication process to ensure successful redirection.
2. Configure App Registration Permissions for Key Vault
Assign appropriate roles (e.g., Reader or Contributor) to the App Registration:
- Navigate to Access Control (IAM) in the Azure Portal.
- Click + Add and select Add role assignment.
- Choose the role and assign access to the App Registration.
- Complete the process by clicking Review + Assign.
3. Create Databricks / Fabric Spark Cluster / Environment
Depending on the compute technology:
- In Databricks:
- Go to Clusters and click Create Cluster.
- Configure cluster settings, including the Spark version, node types, autoscaling, etc.
- In Microsoft Fabric:
- Access Spark Environments and create a Spark pool.
- Configure settings and initiate creation.
4. Deploy Lucid Data Hub Package & Jobs Notebook
Deploy Lucid Data Hub packages and application job notebooks in Databricks or Fabric Spark. Ensure the Spark environment is correctly configured before deployment.
5. Lucid Data Hub License Key Generation & Configuration
Generate and configure a Lucid Data Hub license key in the Spark environment to enable automation and data processing tasks.
6. Configure Lucid Application Portal
Provide the following configuration details in the Lucid Management Portal:
- Azure Open AI Configuration
- Azure DevOps / GitHub Repo Configuration