Module 1: Overview and SetUp
Module 1: Data Pod Setup
Setting up a Data Pod is the first step in onboarding your data for profiling, transformation, and analytics. Follow the guided steps below to configure your Data Pod with the necessary metadata, connections, and context.
Step 1: Launch the Data Pod Setup
From the Data Pods home screen, click on the + ADD DATA POD button.
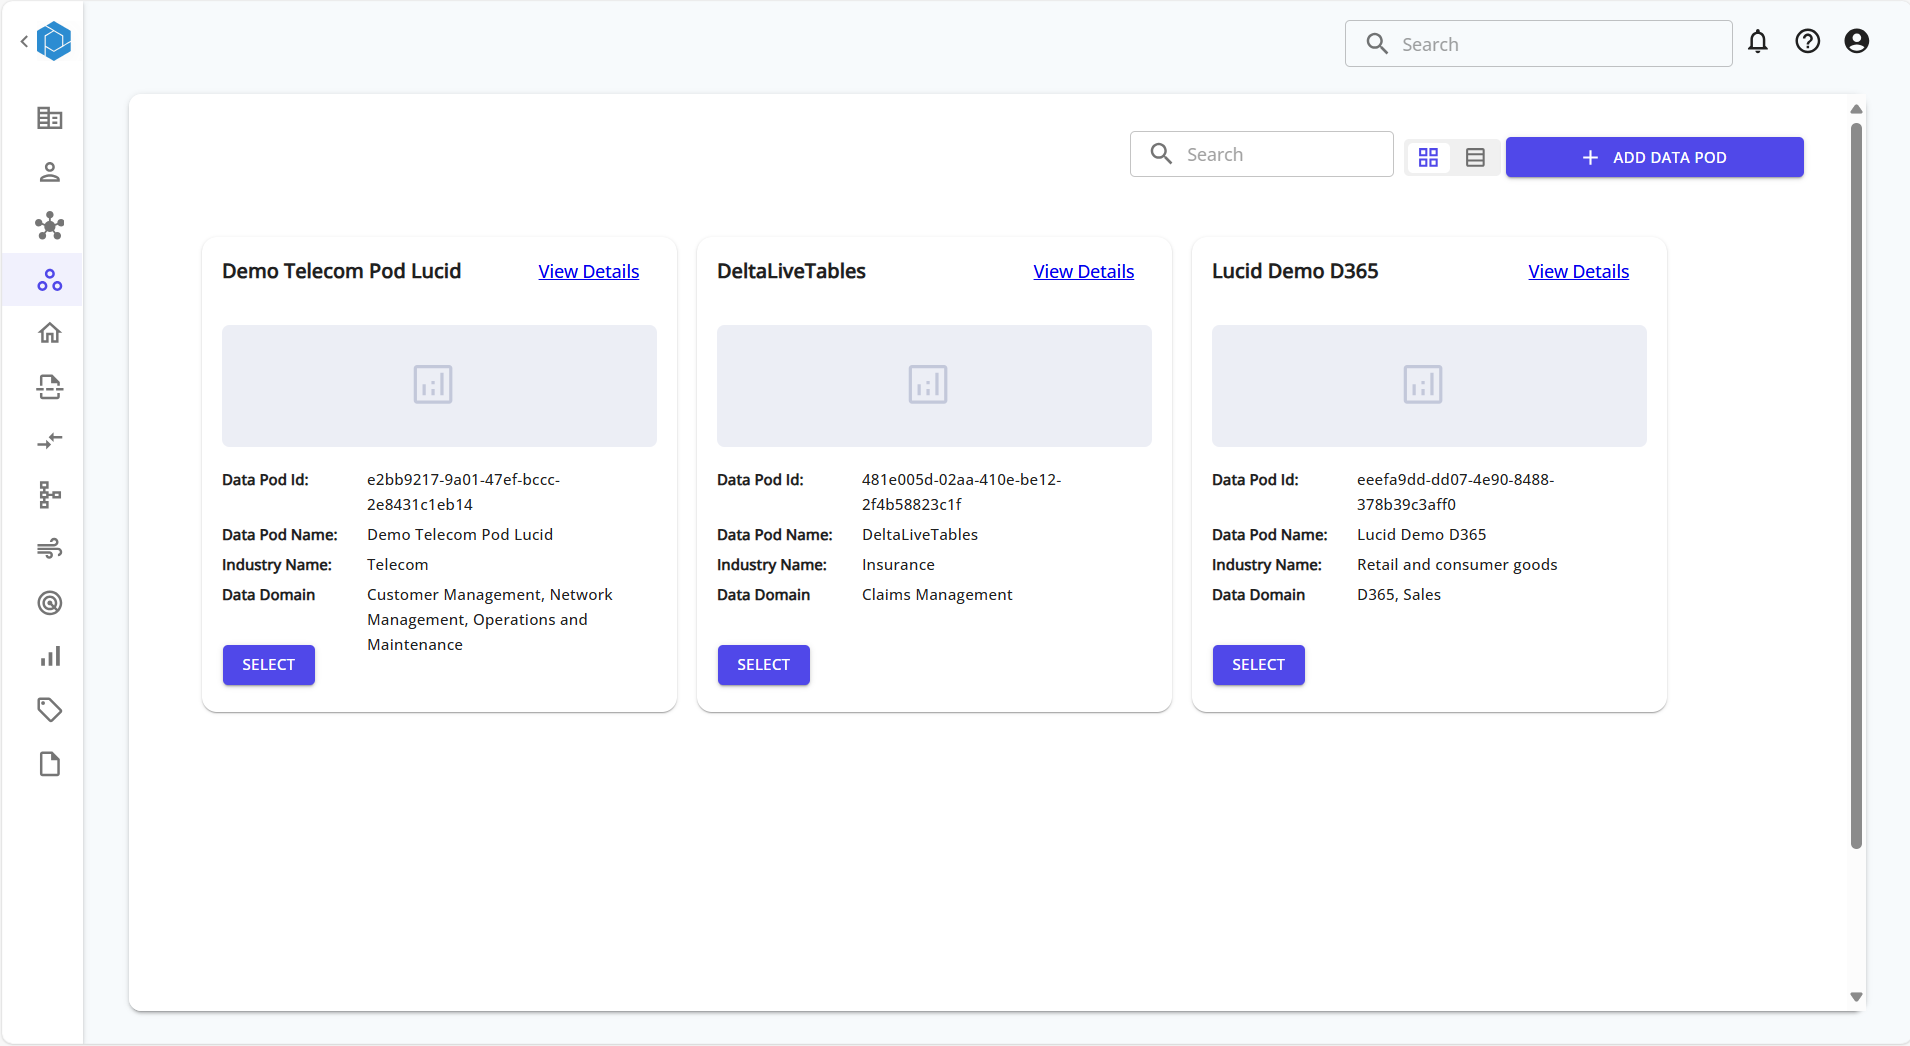
This opens up the multi-step setup process.
Step 2: Fill in Data Pod Details
Enter the Name, Description, Industry, and Location for the Data Pod.
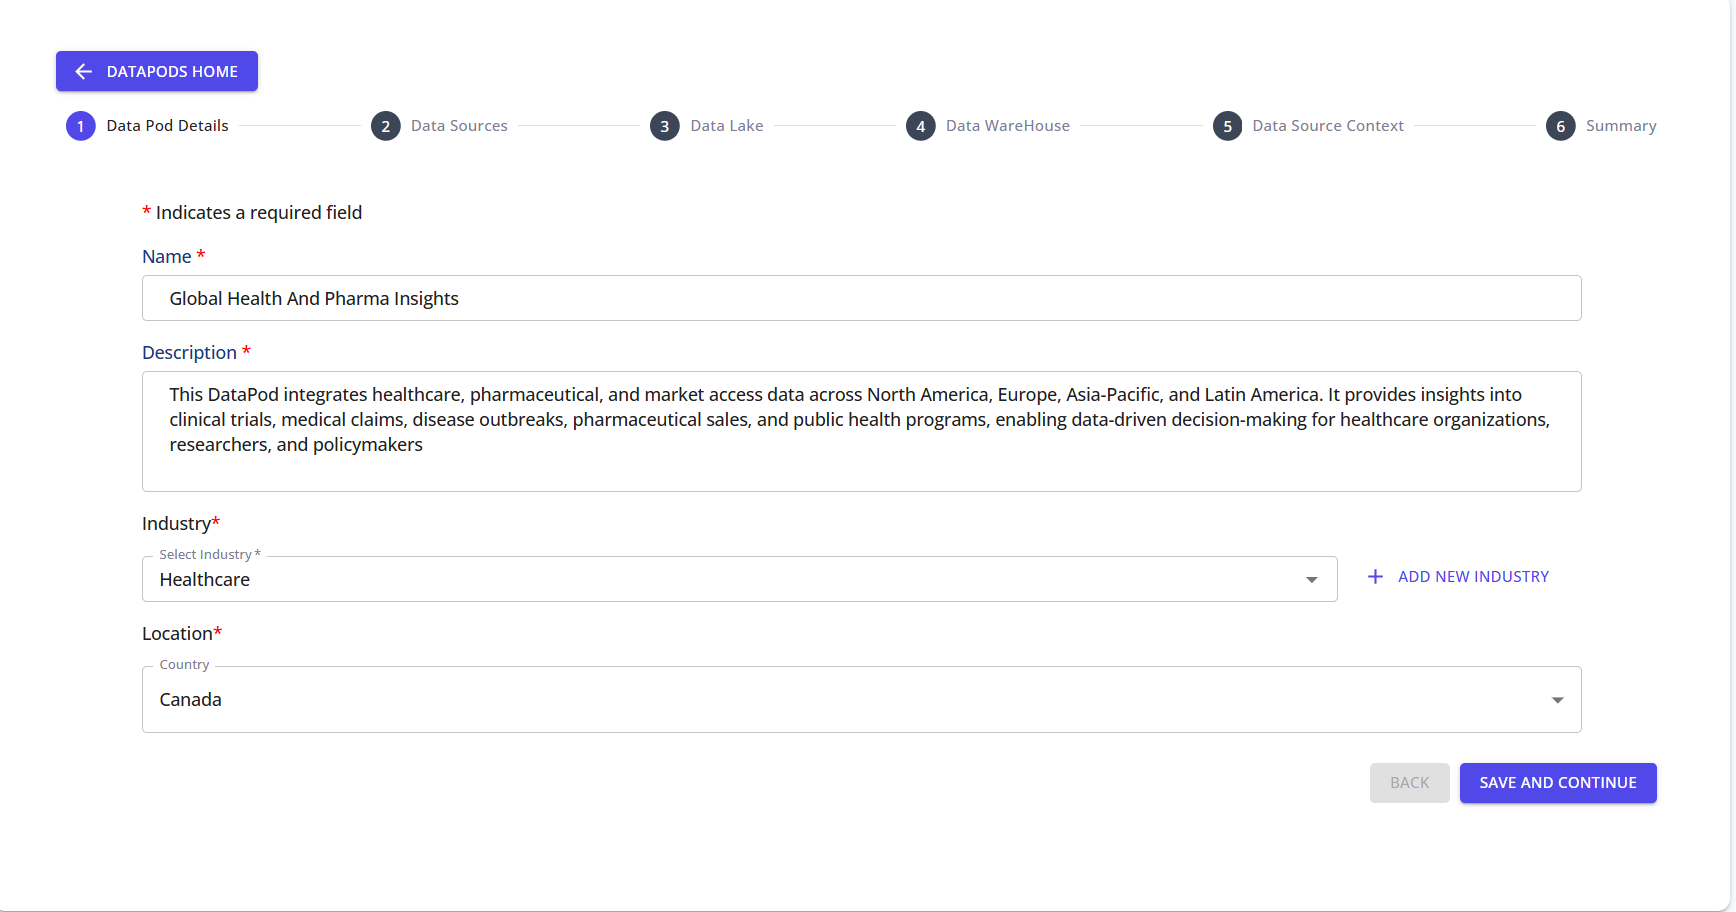
These values define the identity of your Data Pod and help categorize it for domain-specific processing.
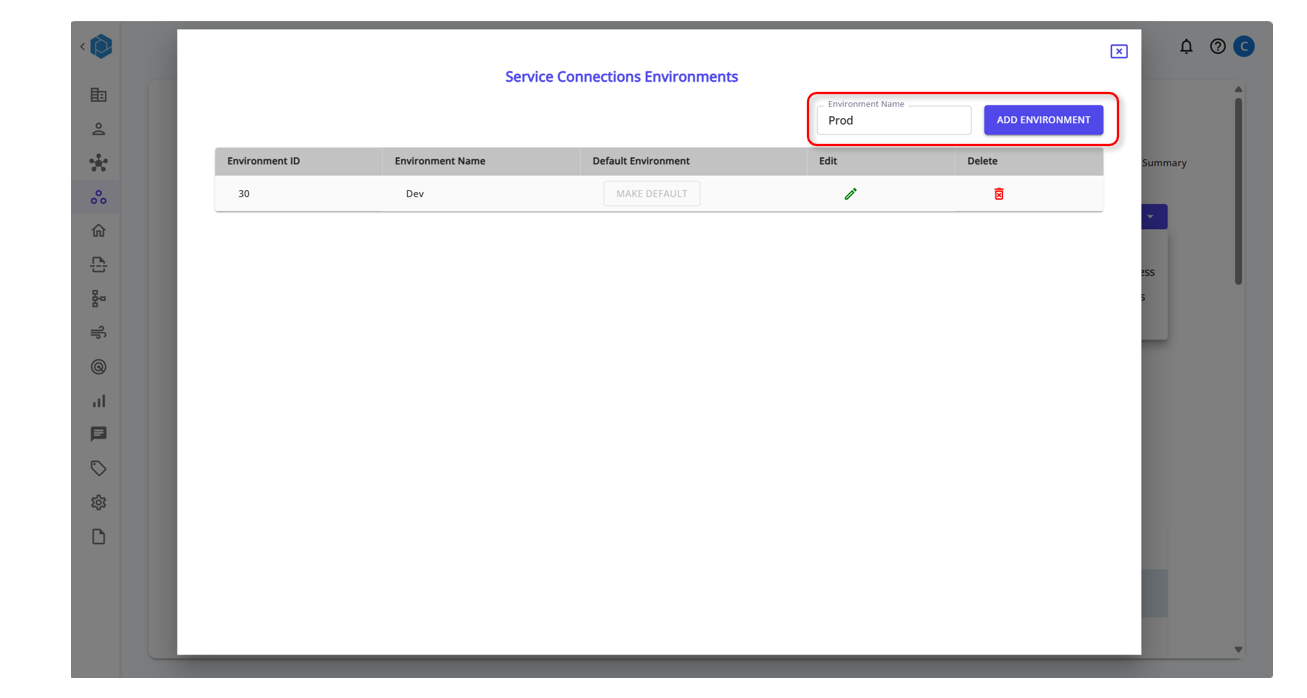
Step 3: Manage Environments
Create Environment Zones for different stages of Production
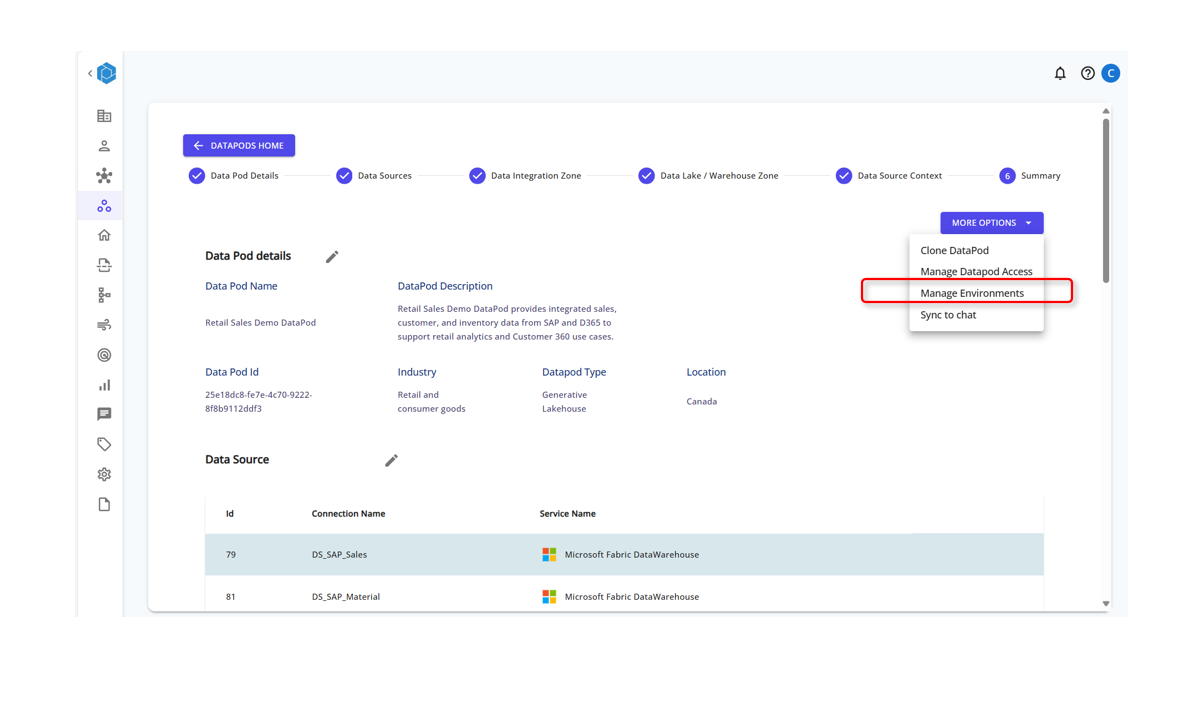
Add the Environment Type
Create Data Sources or Data Integration Zones to fetch and load data to various workspaces based on the Environment Type
Step 3: Manage Service Connections
Service Connection Information can be stored in two ways :
-- Lucid Managed - Stored in Lucids MetaDataDB -- KeyVaultManaged - Stored in Key Vaults like Azure and can be fetched safely for use
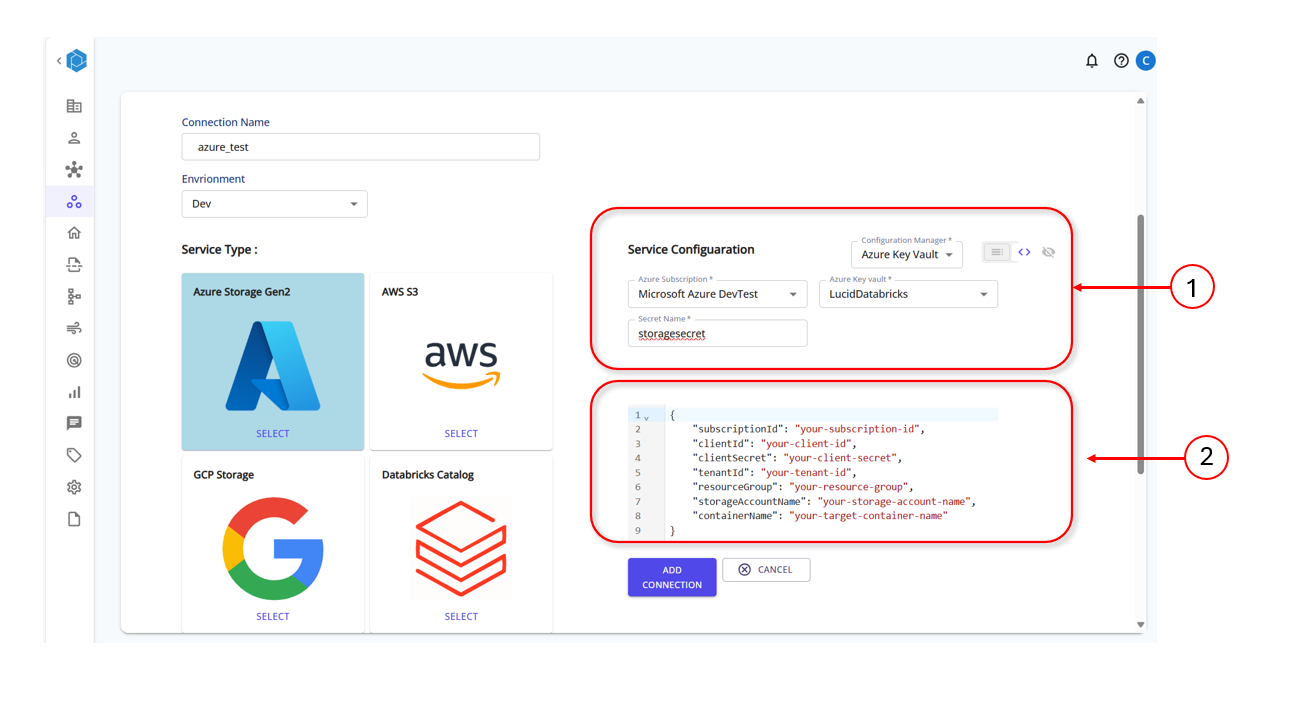
Set up the Keyvault in Azure and based on the service type provide the connection string details as shown int he template:
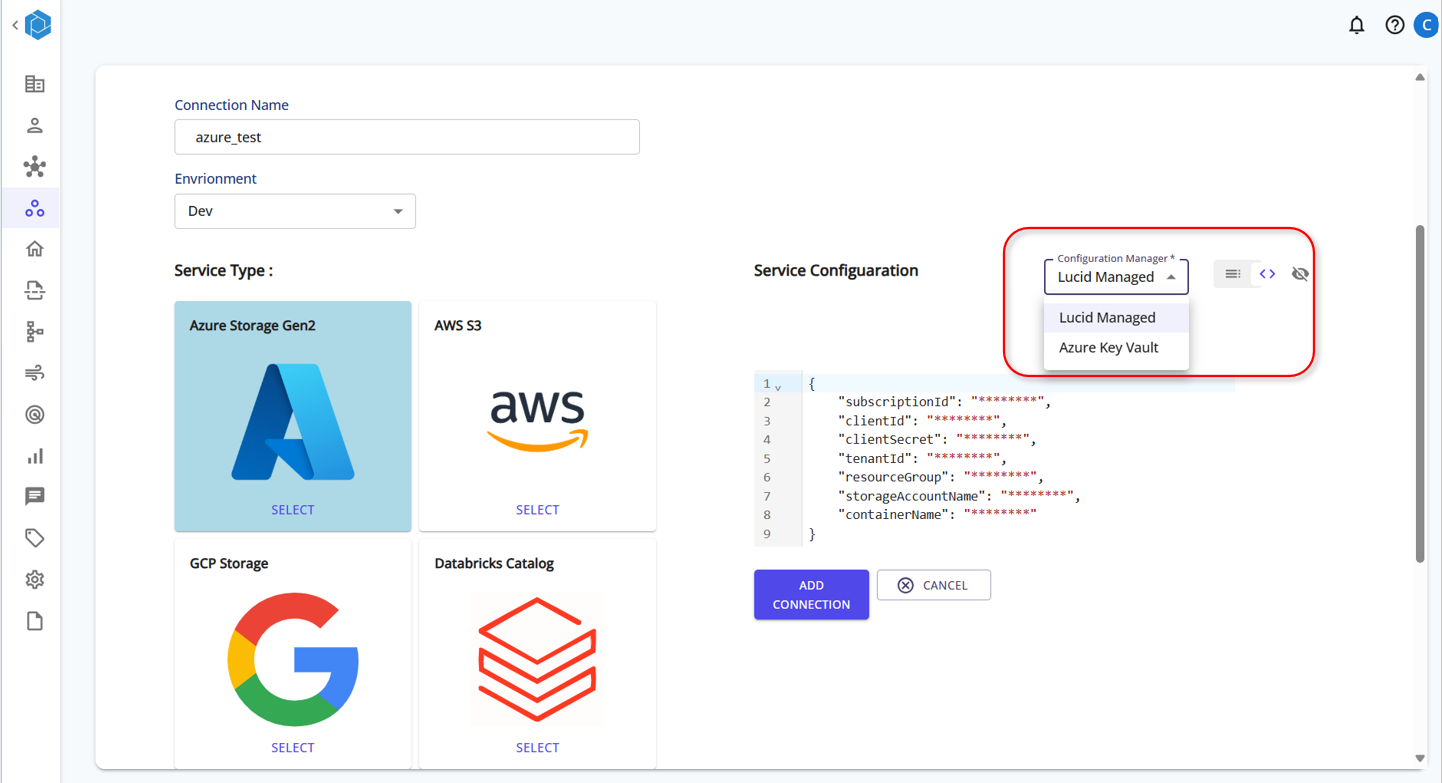
Provide the Key Vault Details in Lucids Servoce Connection Page
Create Data Sources or Data Integration Zones to fetch and load data to various workspaces based on the Environment Type
Step 5: Configure Data Sources
Add one or more data sources from where your data will be read. Supported options include:
- Azure Storage Gen2
- AWS S3
- GCP Storage
- Databricks Catalog
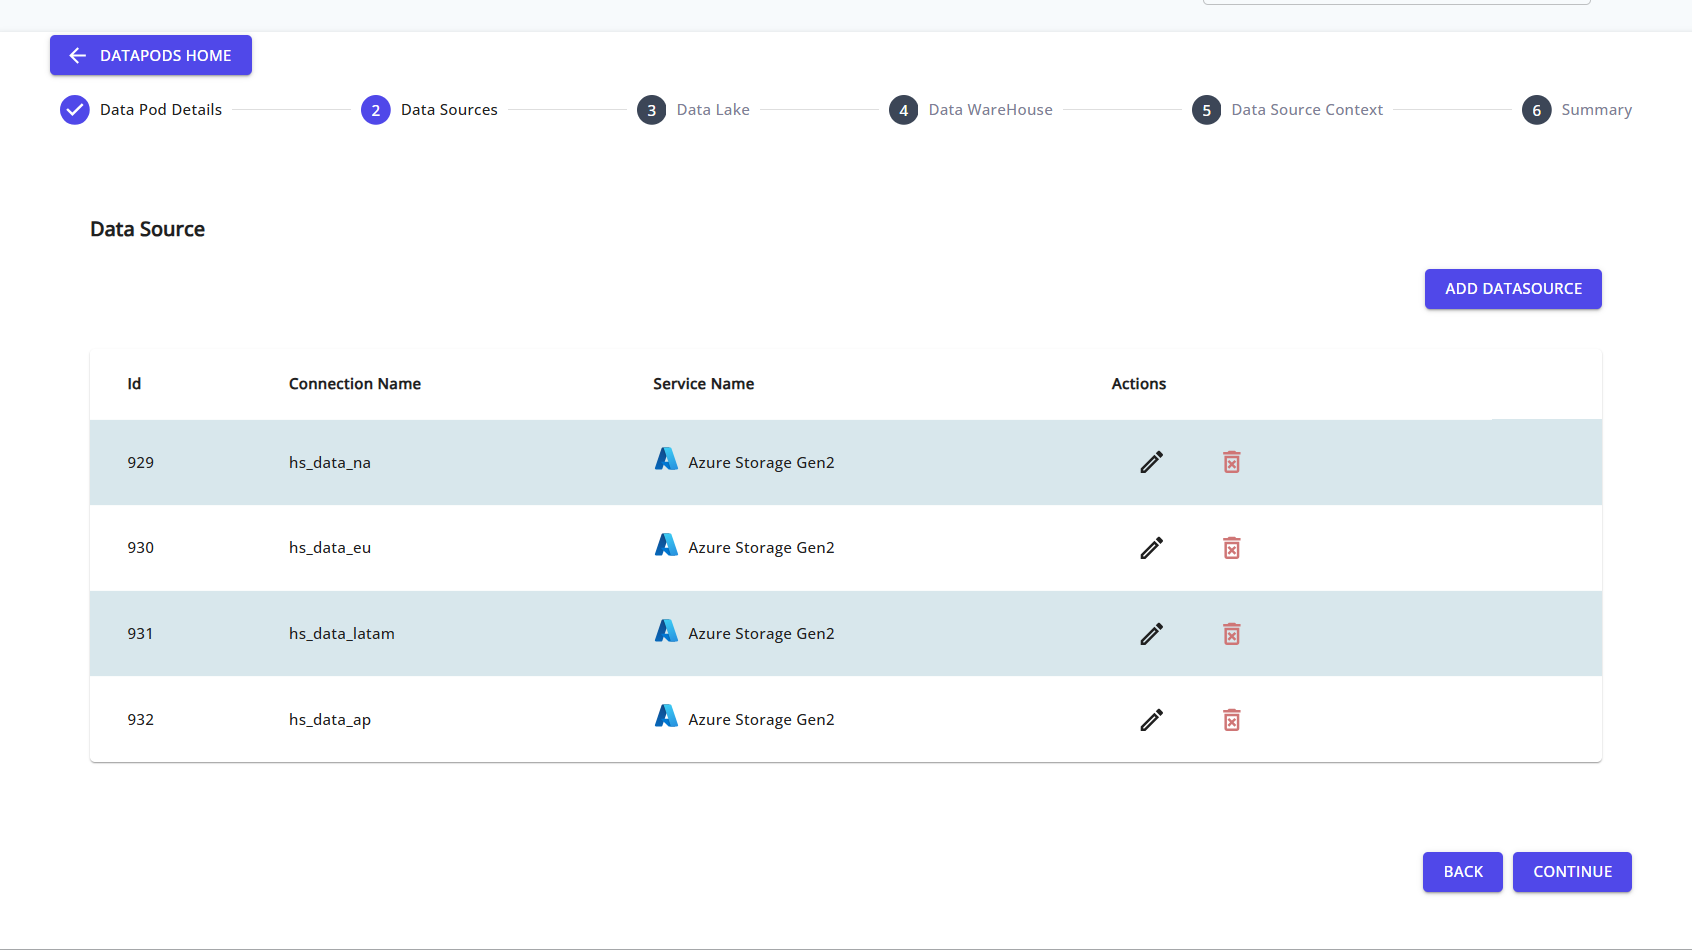
You can click ADD DATASOURCE to create a new connection.
Step 6: Create a Data Source Connection
Specify the connection name, select the service type, and fill in the required configuration values.

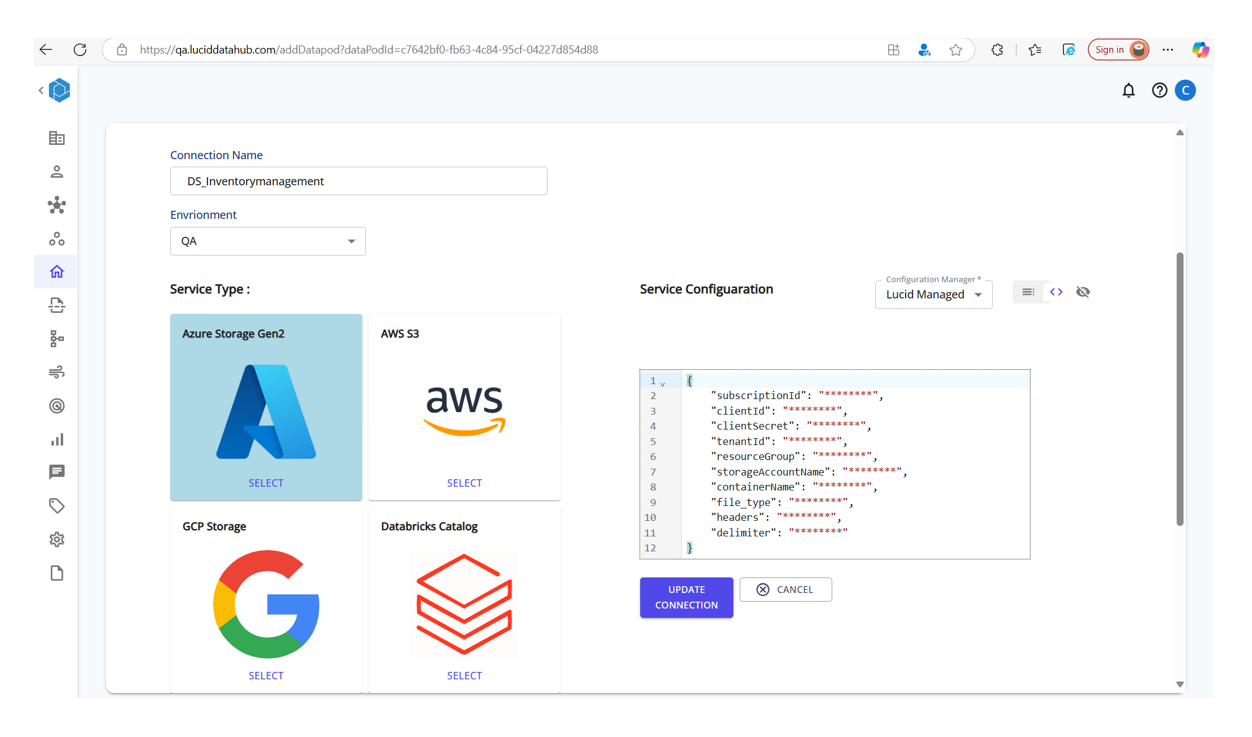
This enables the platform to securely read raw data from your specified storage layer.
Step 7: Add a Data Integration Zone (Optional)
Set up a data intergration zone destination where the processed or profiled data will be written.
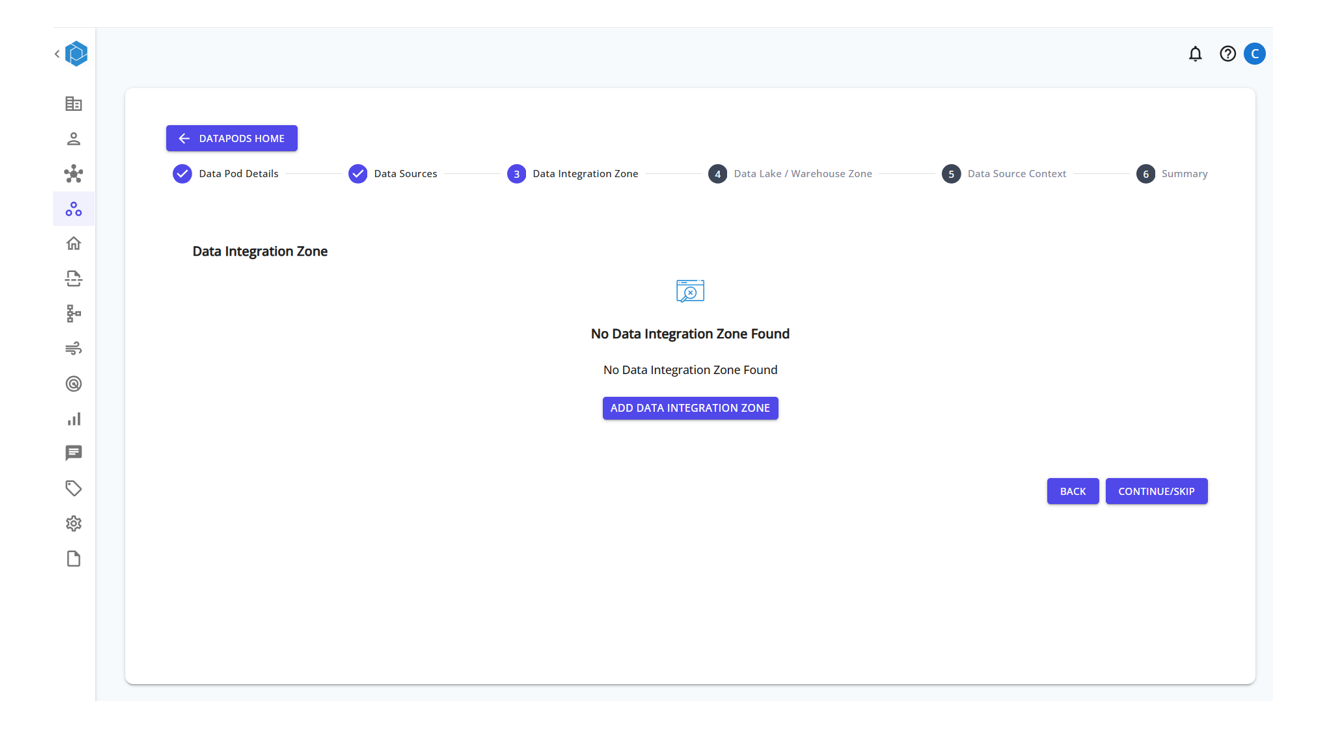
Click ADD DATA INTEGRATION ZONE and provide the necessary connection details.
Step 8: Create a Data Intergration Connection
Choose the service (e.g., Azure Storage Gen2 or Microsoft OneLake), and enter the configuration JSON to define your storage endpoint.
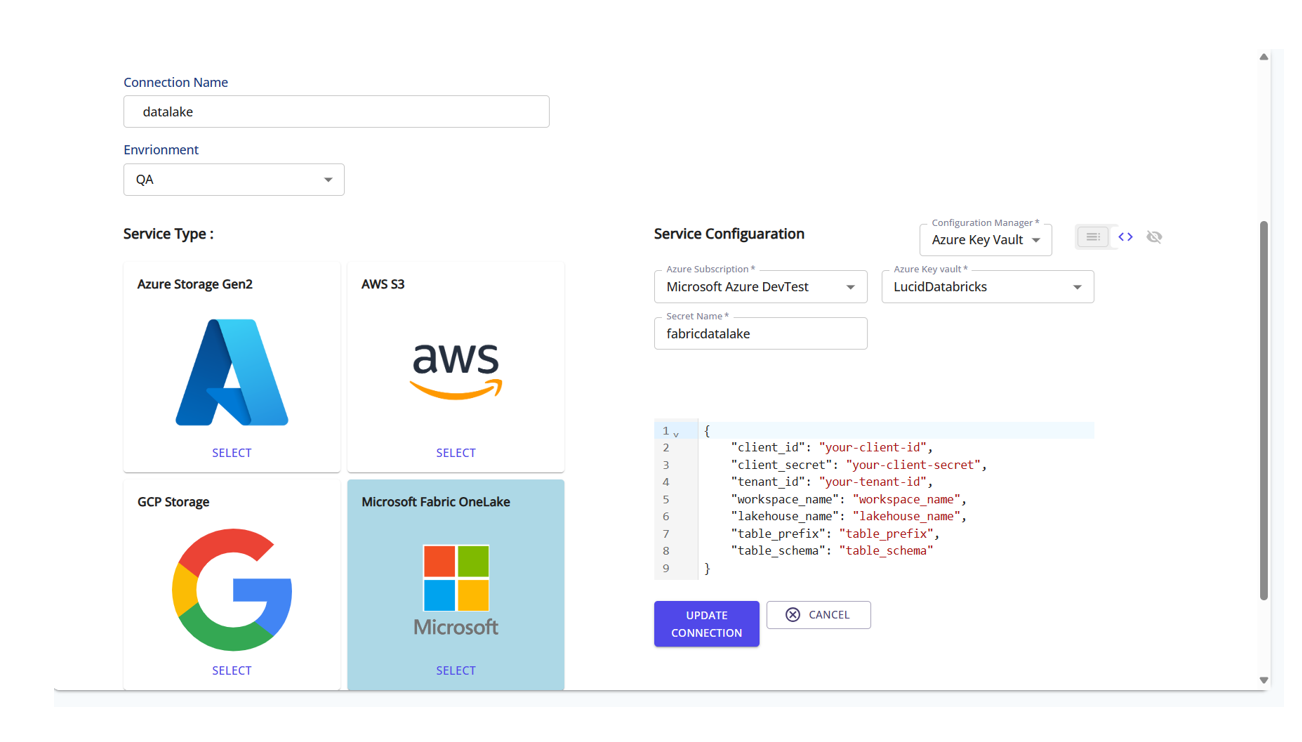
The data lake acts as the write destination for enriched or intermediate data.
Step 9: Add a Data Warehouse (Optional)
Set up a data warehouse destination for structured analytics and reporting.
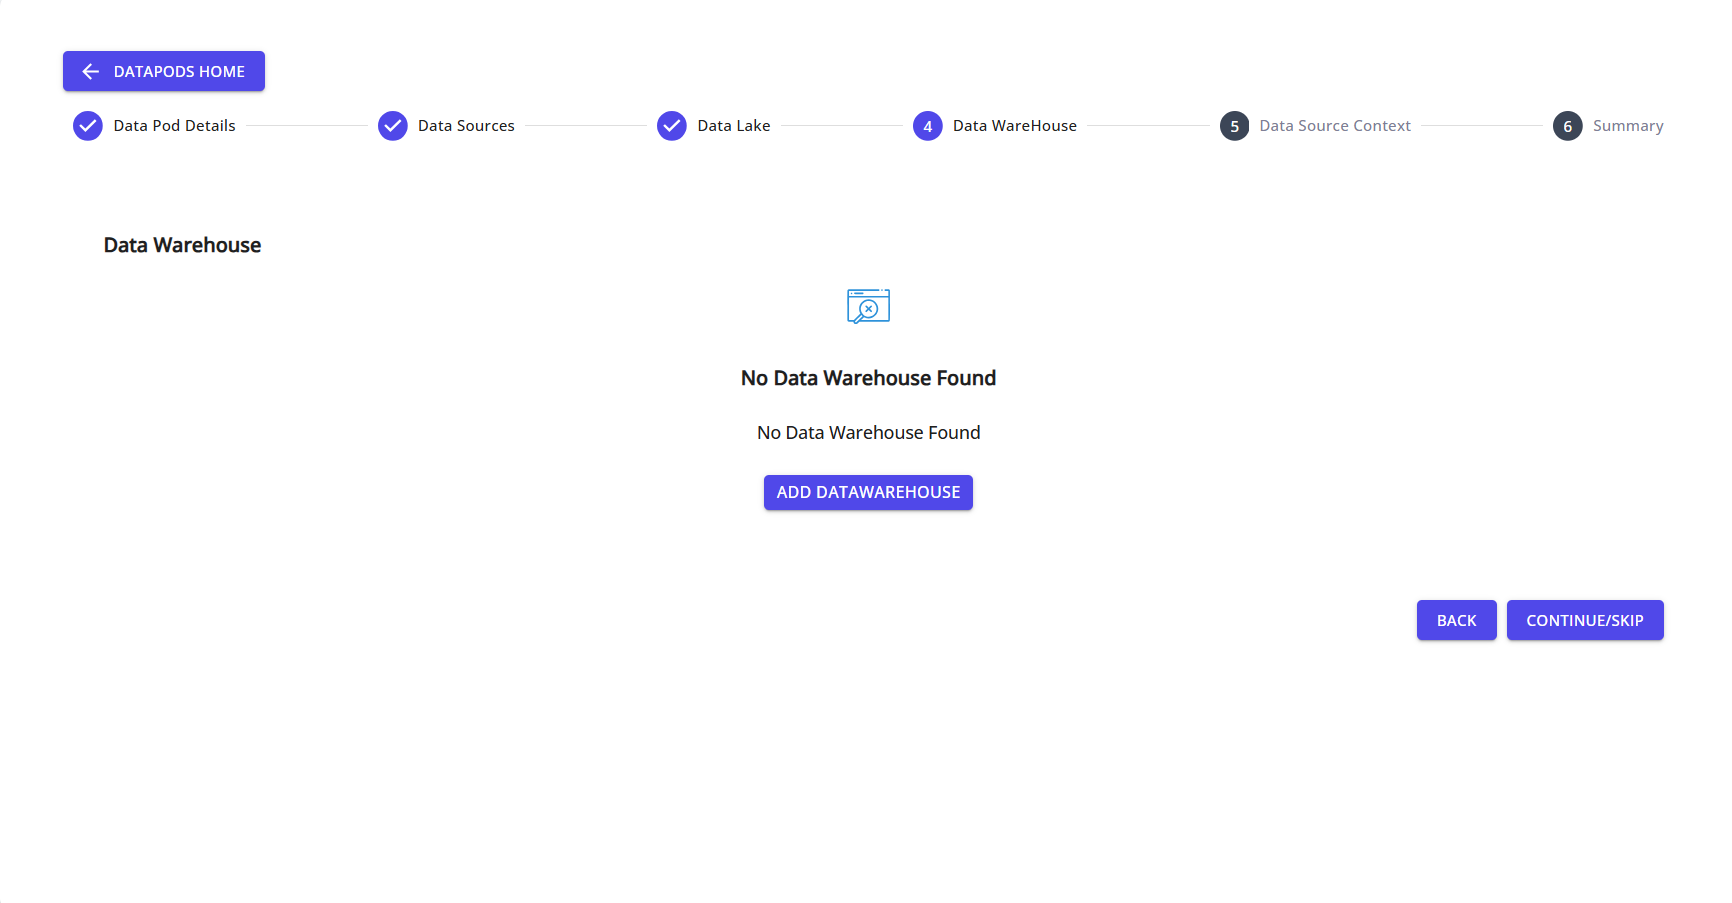
Click ADD DATAWAREHOUSE to begin setup.
Step 10: Create a Data Warehouse Connection
Choose the appropriate service (e.g., Microsoft Fabric, Databricks Catalog), then input your connection credentials and metadata.
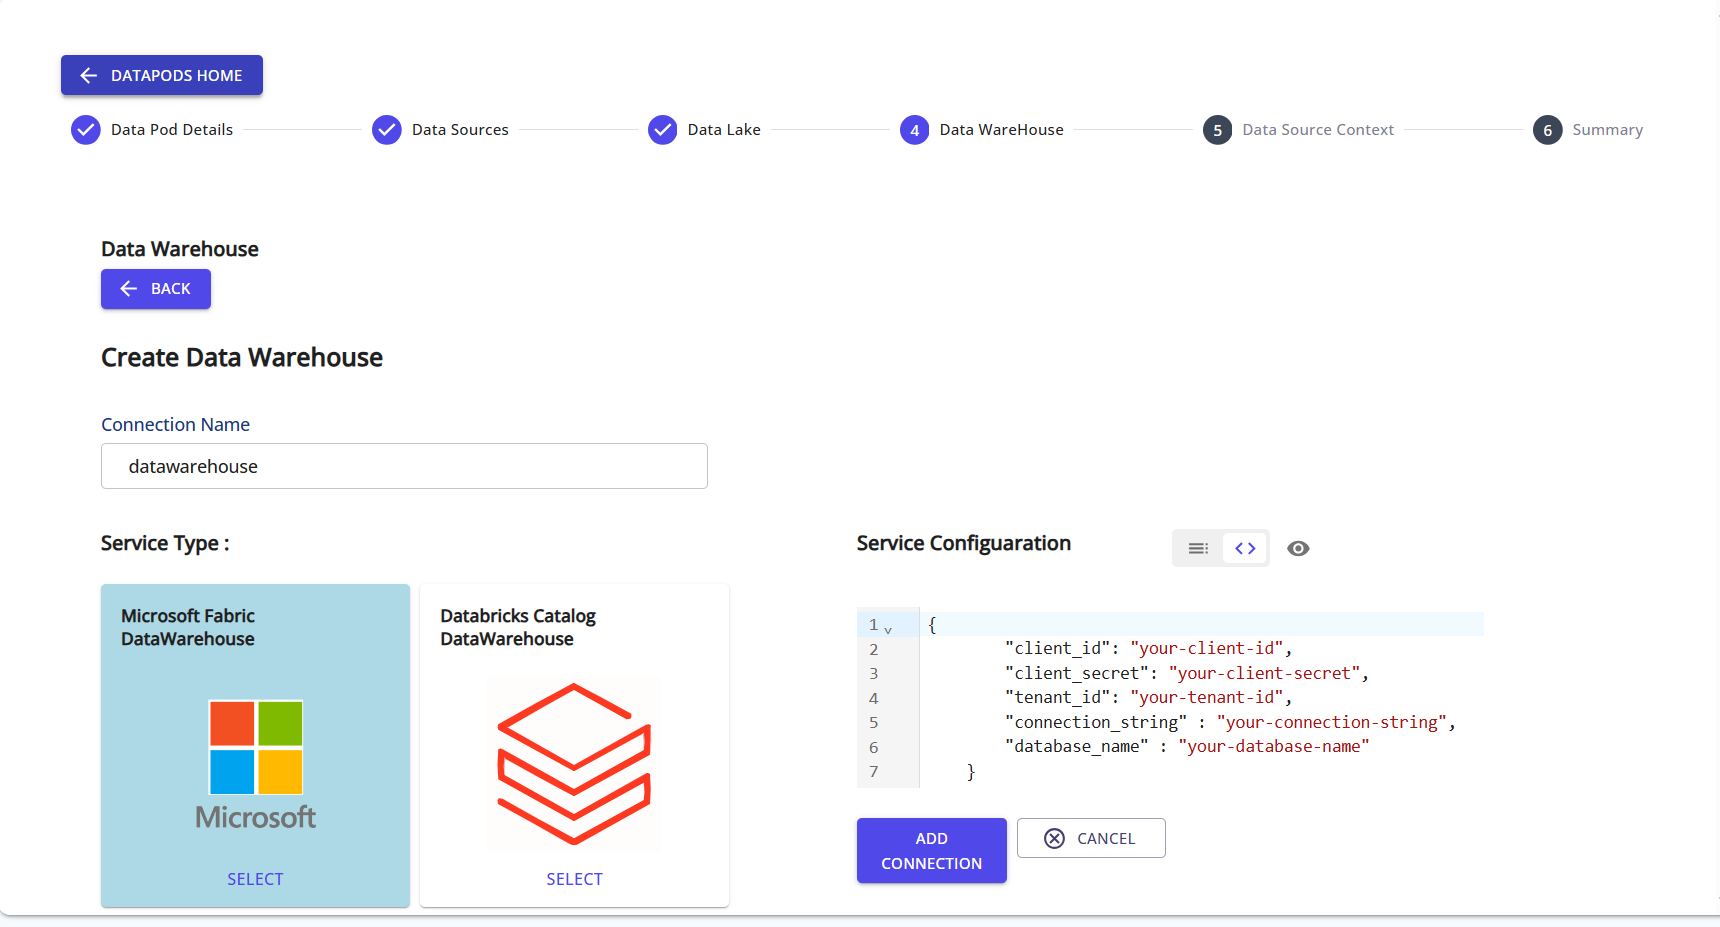
The warehouse is used to write finalized, structured data for BI and reporting use cases.
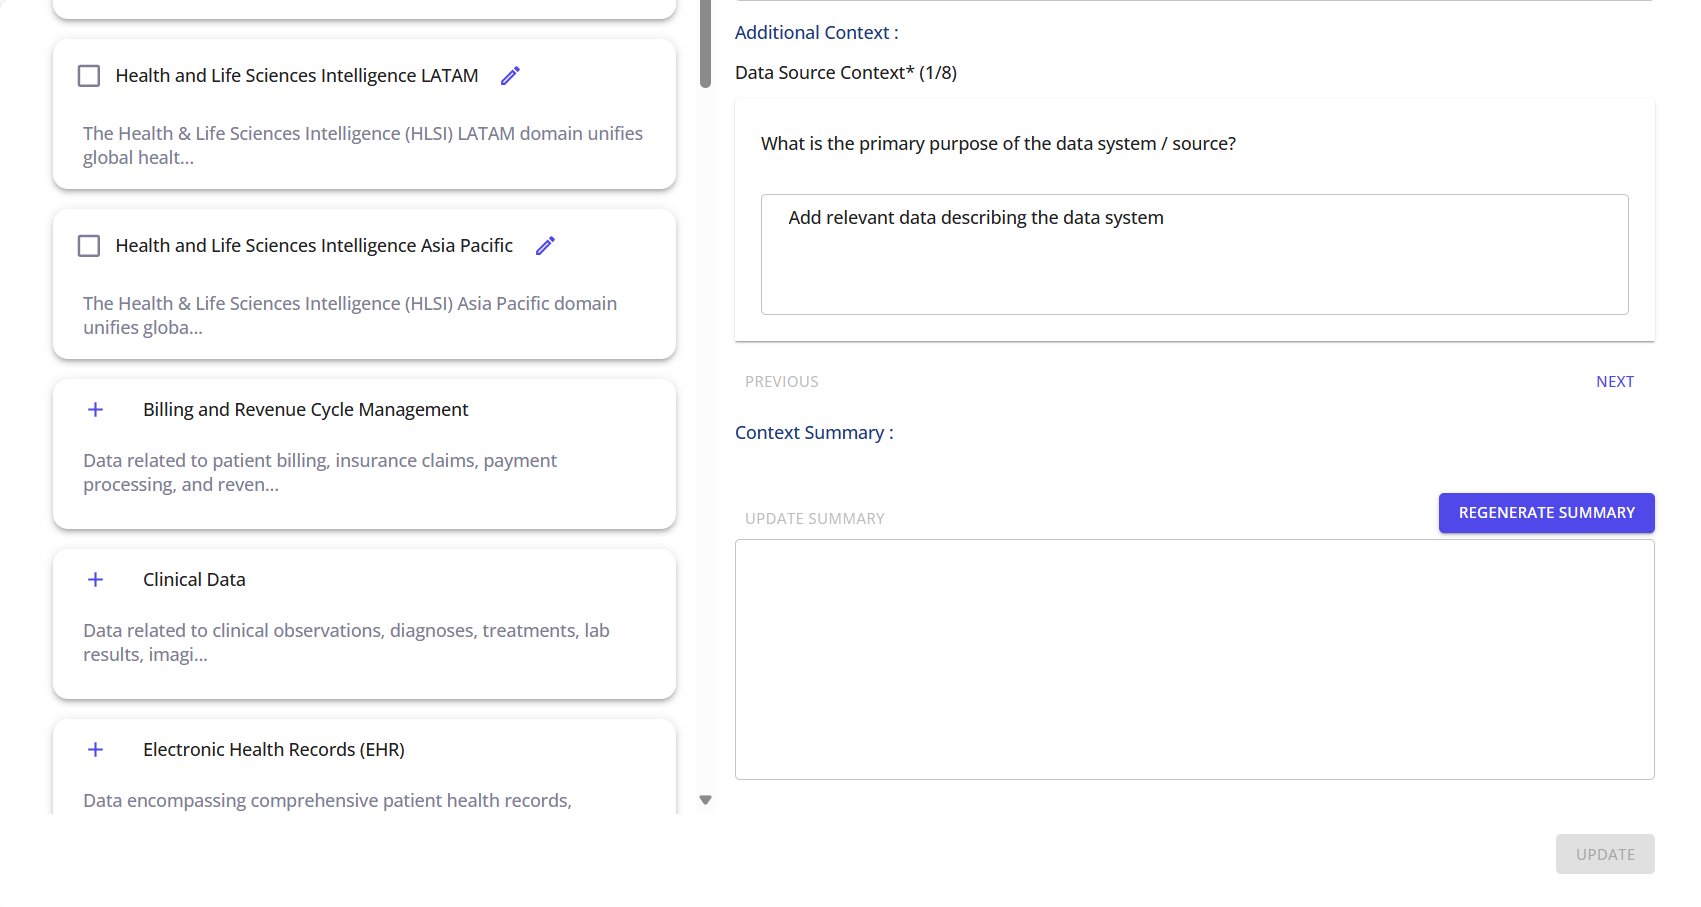
Step 11: Provide Data System Context
Select the relevant data domains and provide contextual descriptions for each, helping enrich metadata for profiling and business understanding.
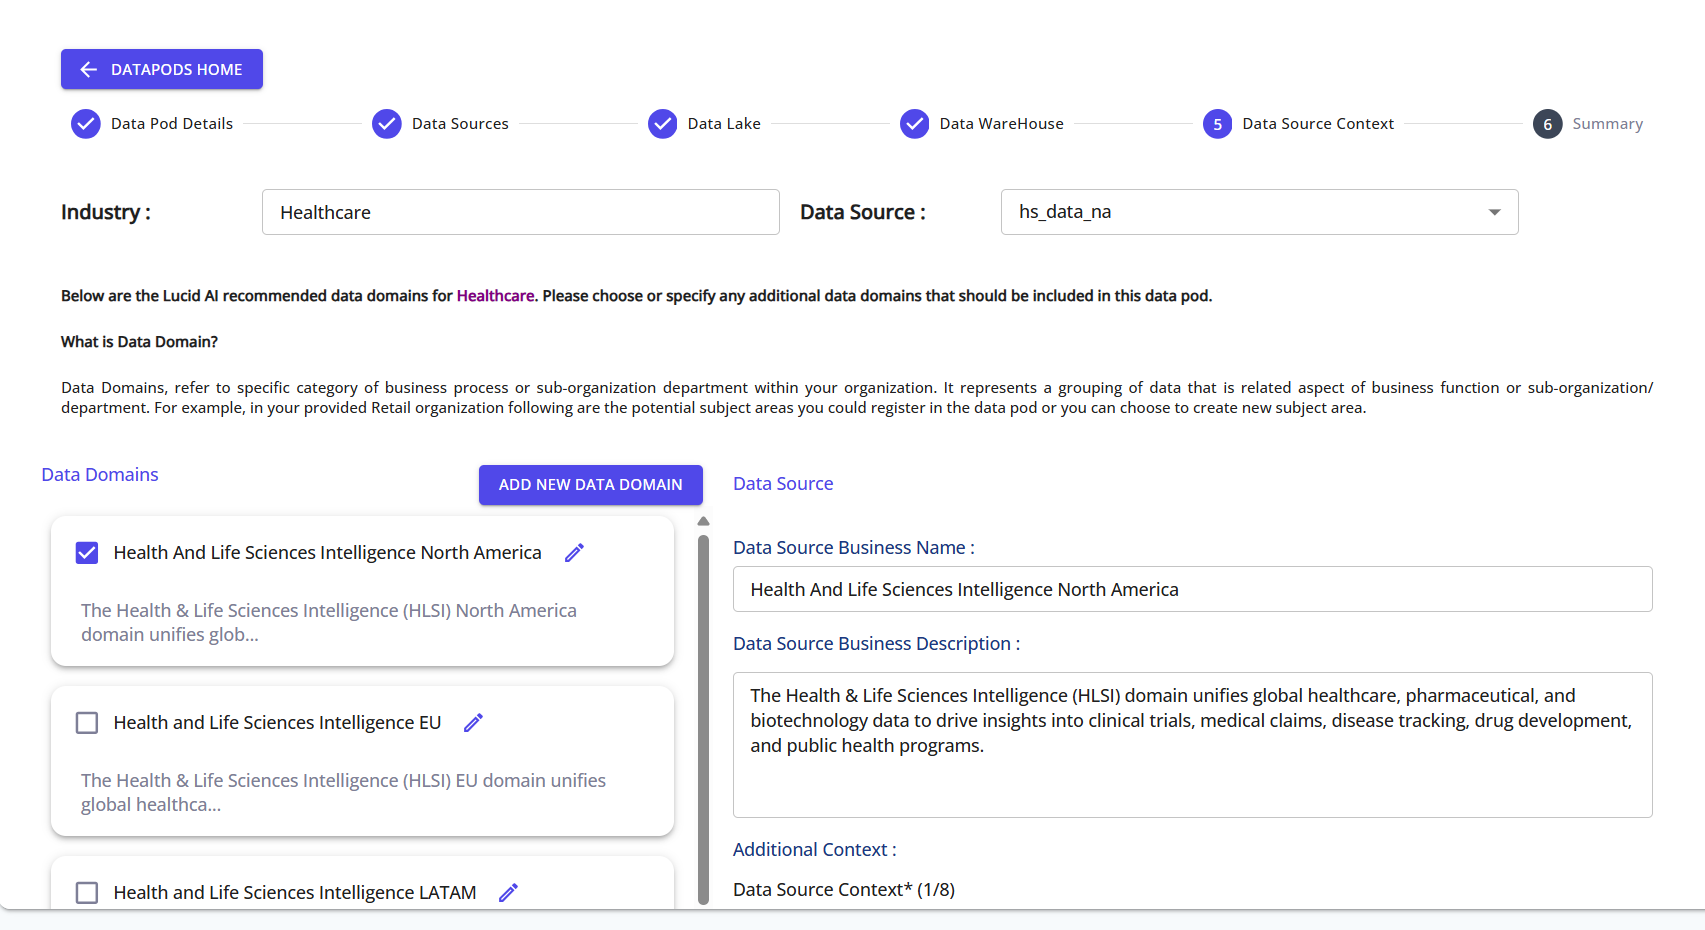
You can also generate a Context Summary to auto-summarize key information about the data systems.
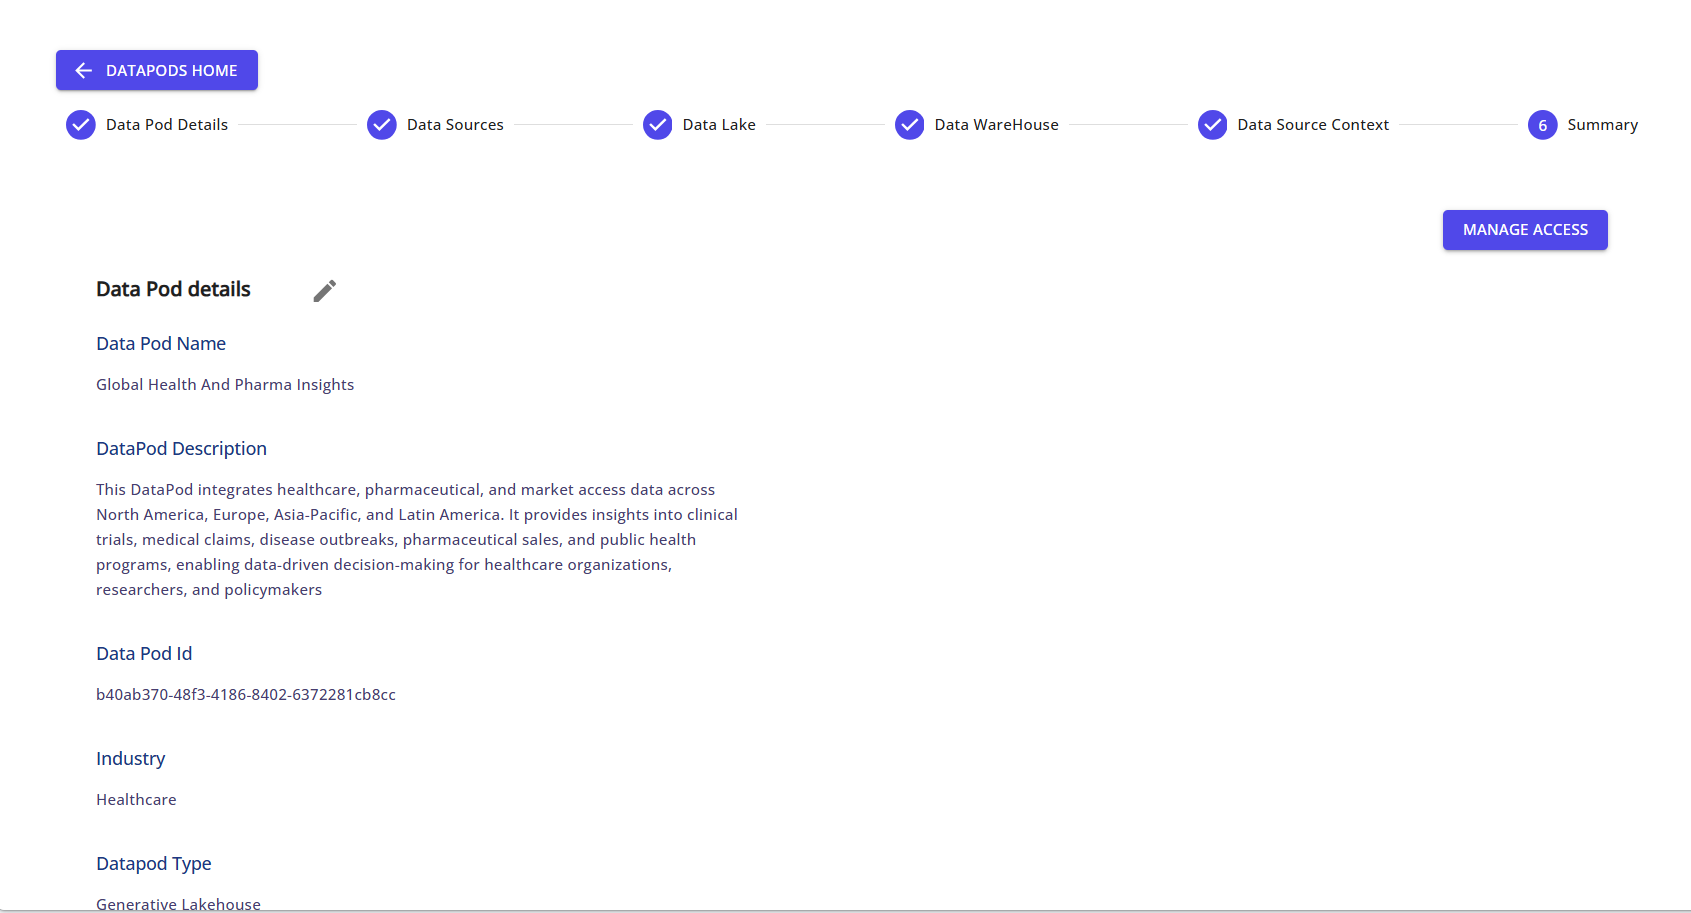
Step 12: Review Summary and Manage Access
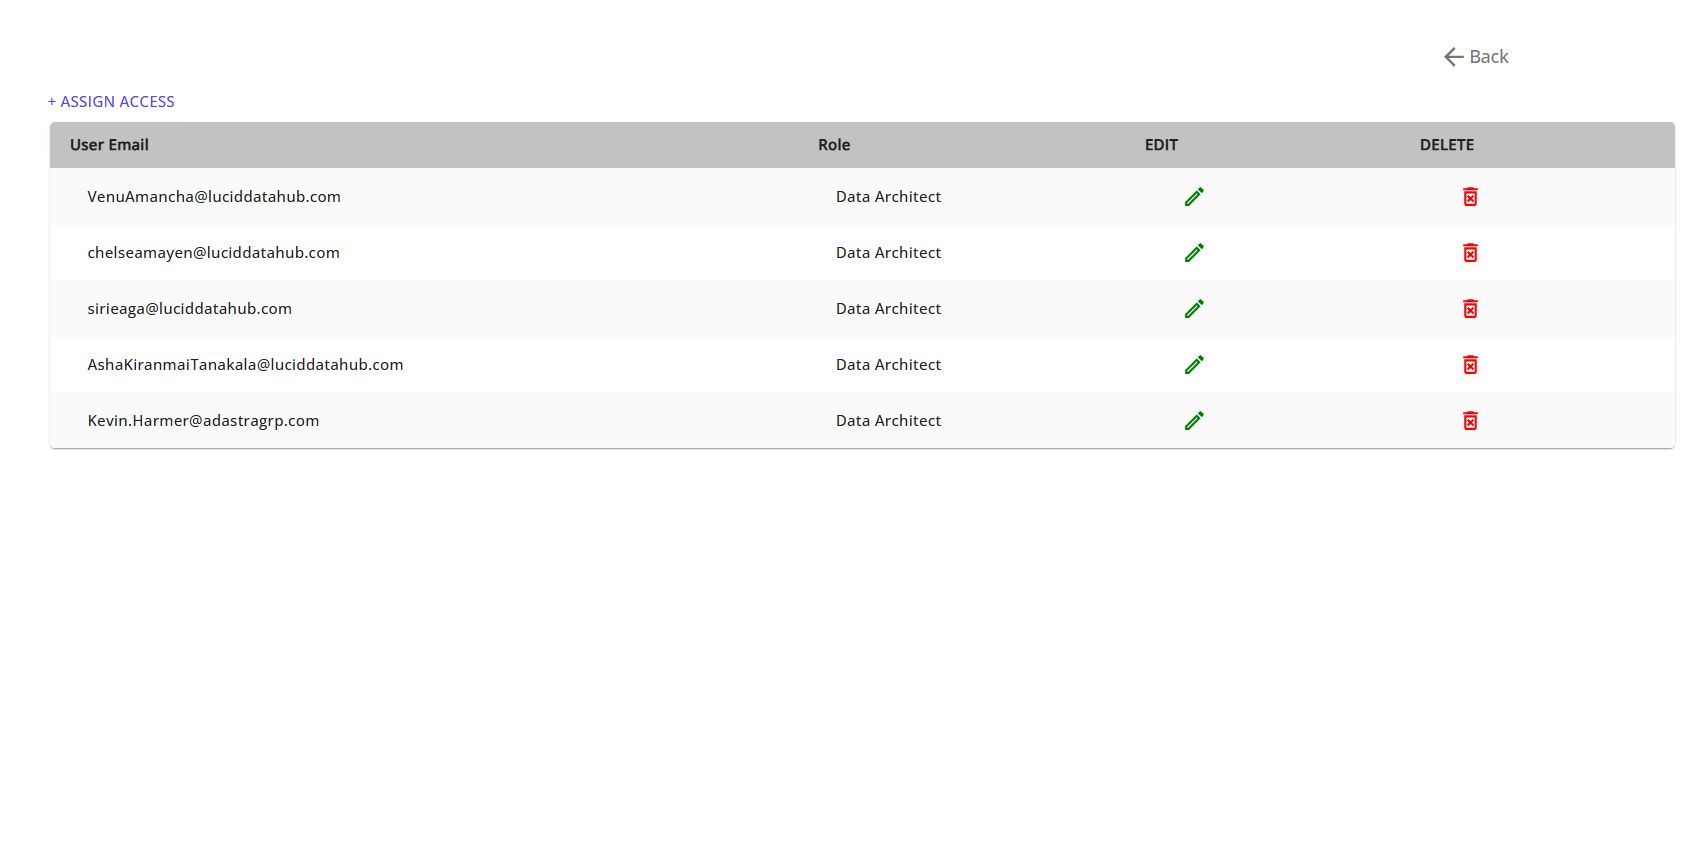
At the final step, review all Data Pod details and click on Manage Access to share it with other users in your organization.
✅ Your Data Pod is now set up and ready!
You can now proceed to profile, transform, and analyze the data within your configured Data Pod.