Module 9: Data Analysis
Data Analytics
Pre-requisities
- Before proceeding with data analytics, ensure that Enriched Entities have been generated for the Use Cases you plan on using.
Step 1: Access the Data Analytics Section
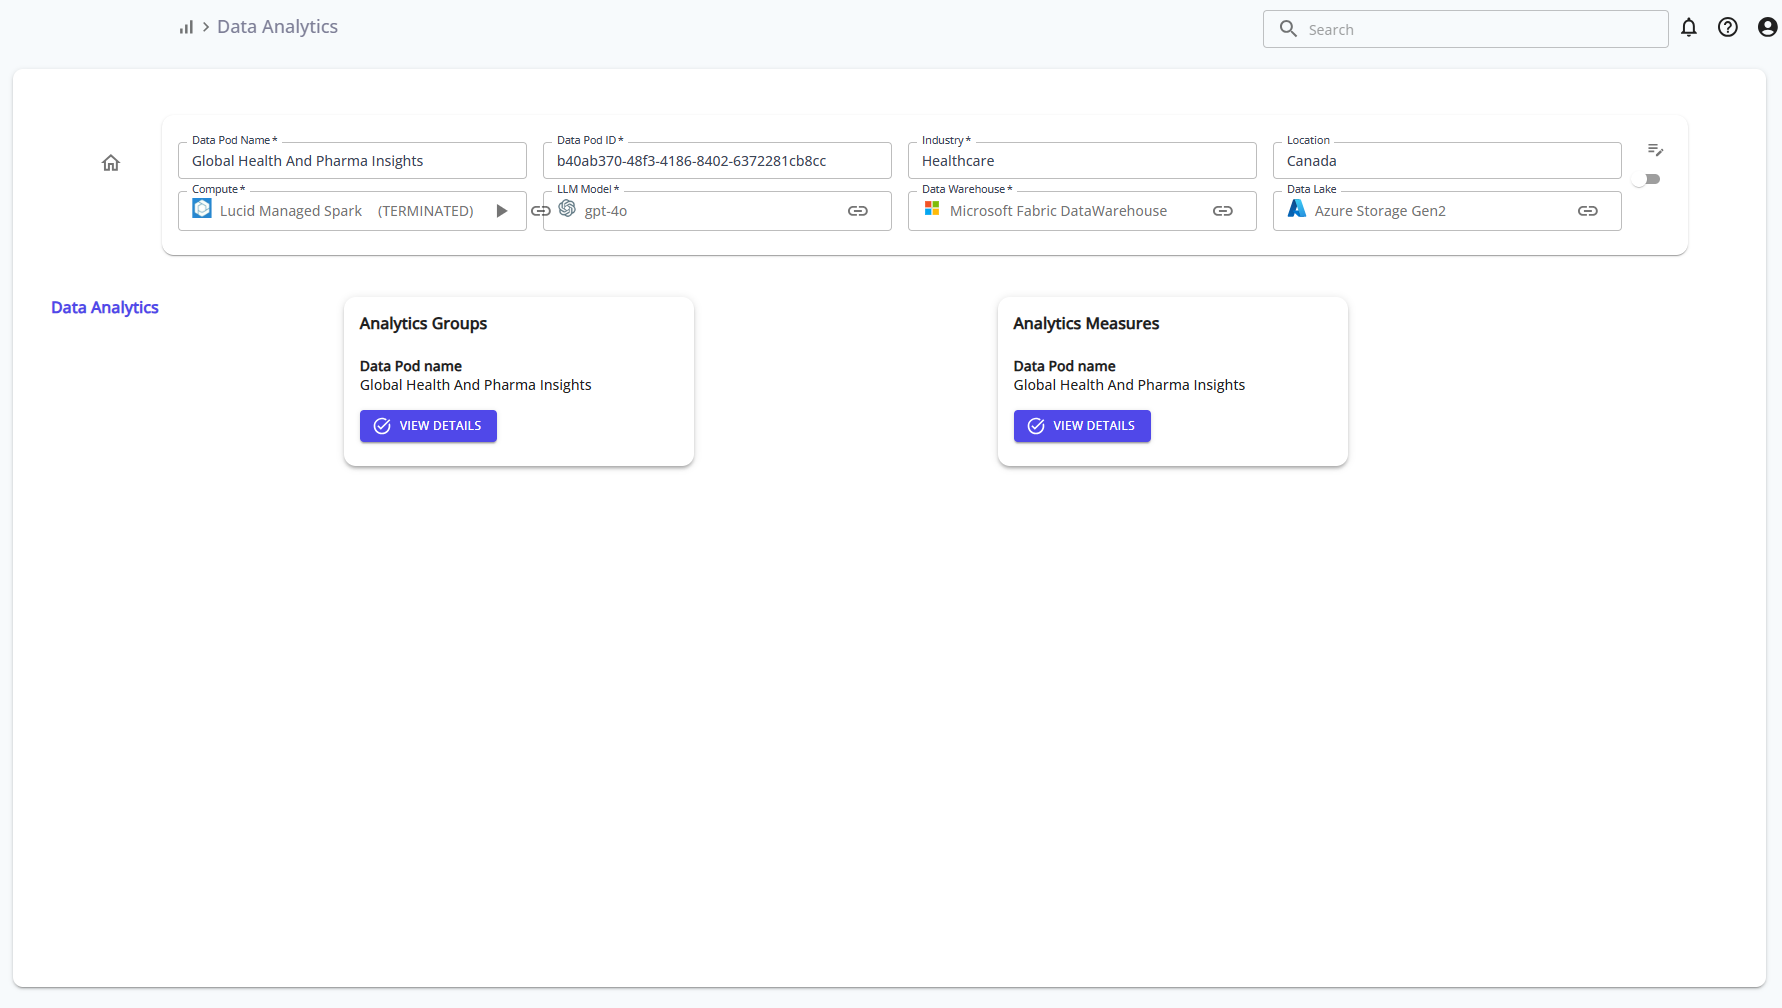
From the sidebar, select the Data Analytics module. You will see two primary sections:
- Analytics Groups: Corresponds to your use cases.
- Analytics Measures: Contains the defined KPIs for those use cases.
Click View Details on either card to proceed.
Reference:

Step 2: Select a Use Case and Add Measures
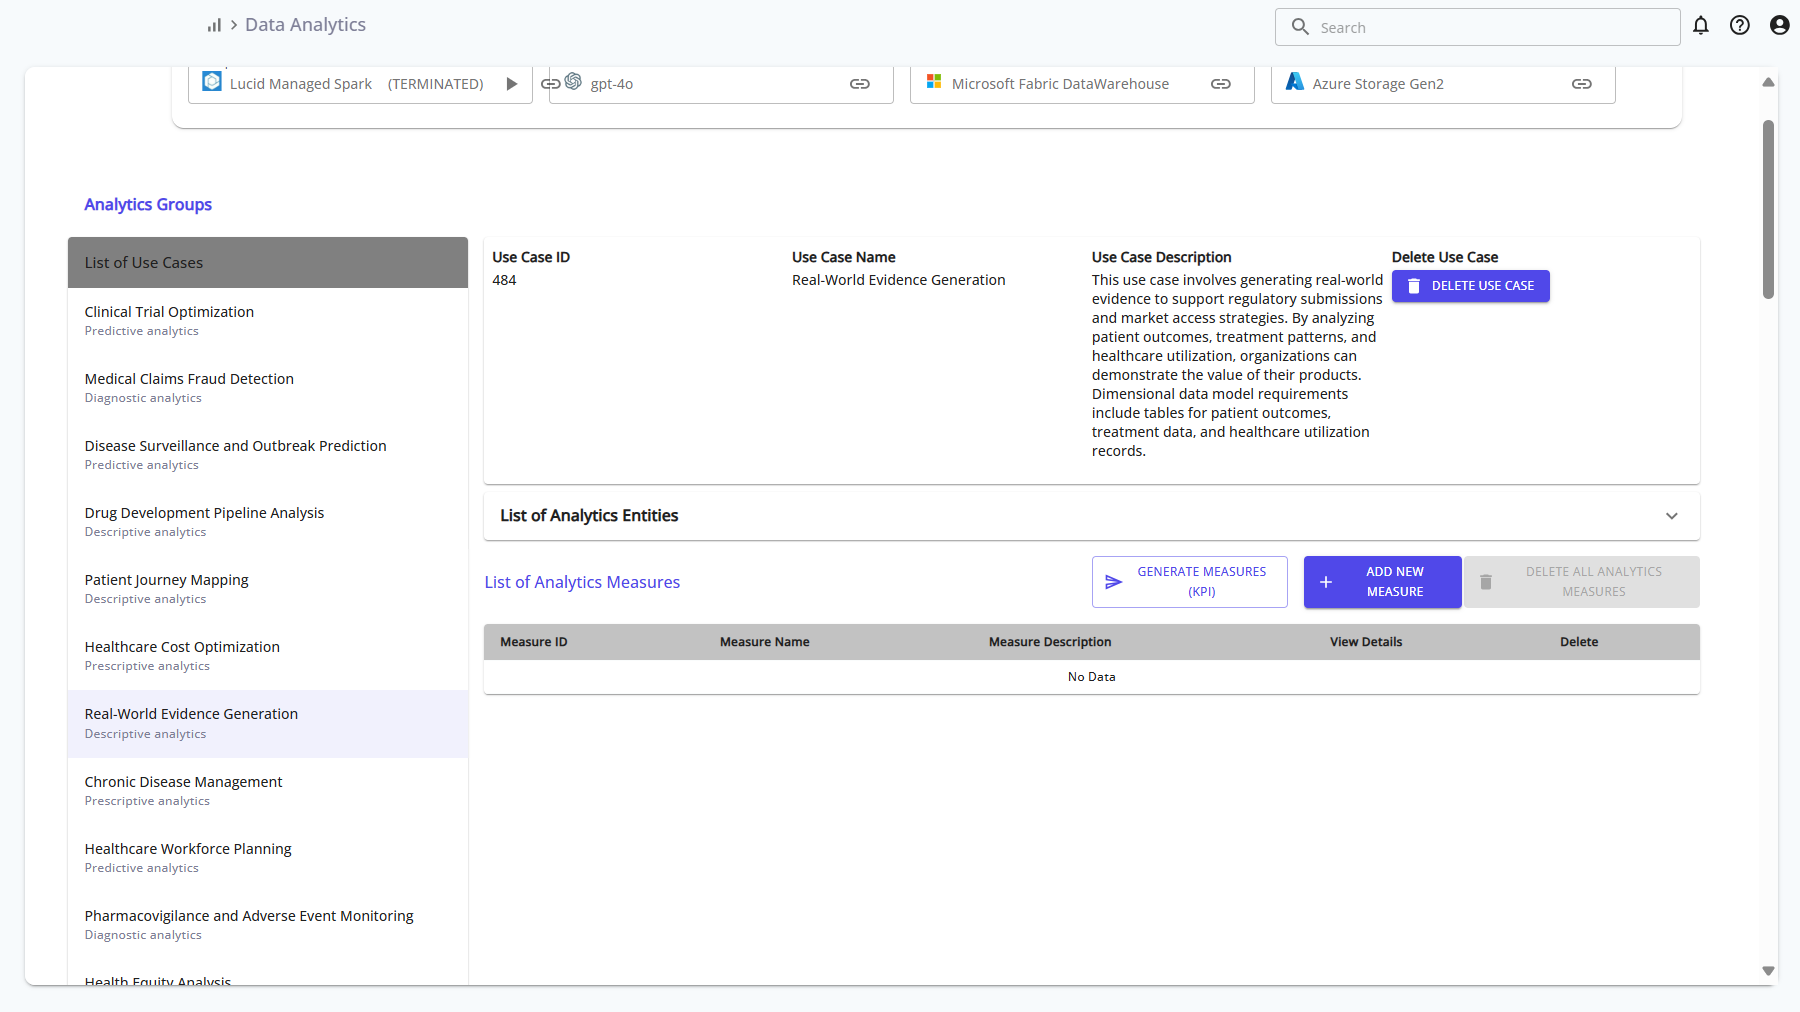
Select a use case from the list on the left. This displays the Use Case ID, name, and description. From here:
- Click Add New Measure to define a new KPI, or
- Click Generate Measures (KPI) to auto-generate based on enriched entities.
This is where you begin associating enriched data with analytical metrics.
Reference:

Step 3: View and Review a Measure
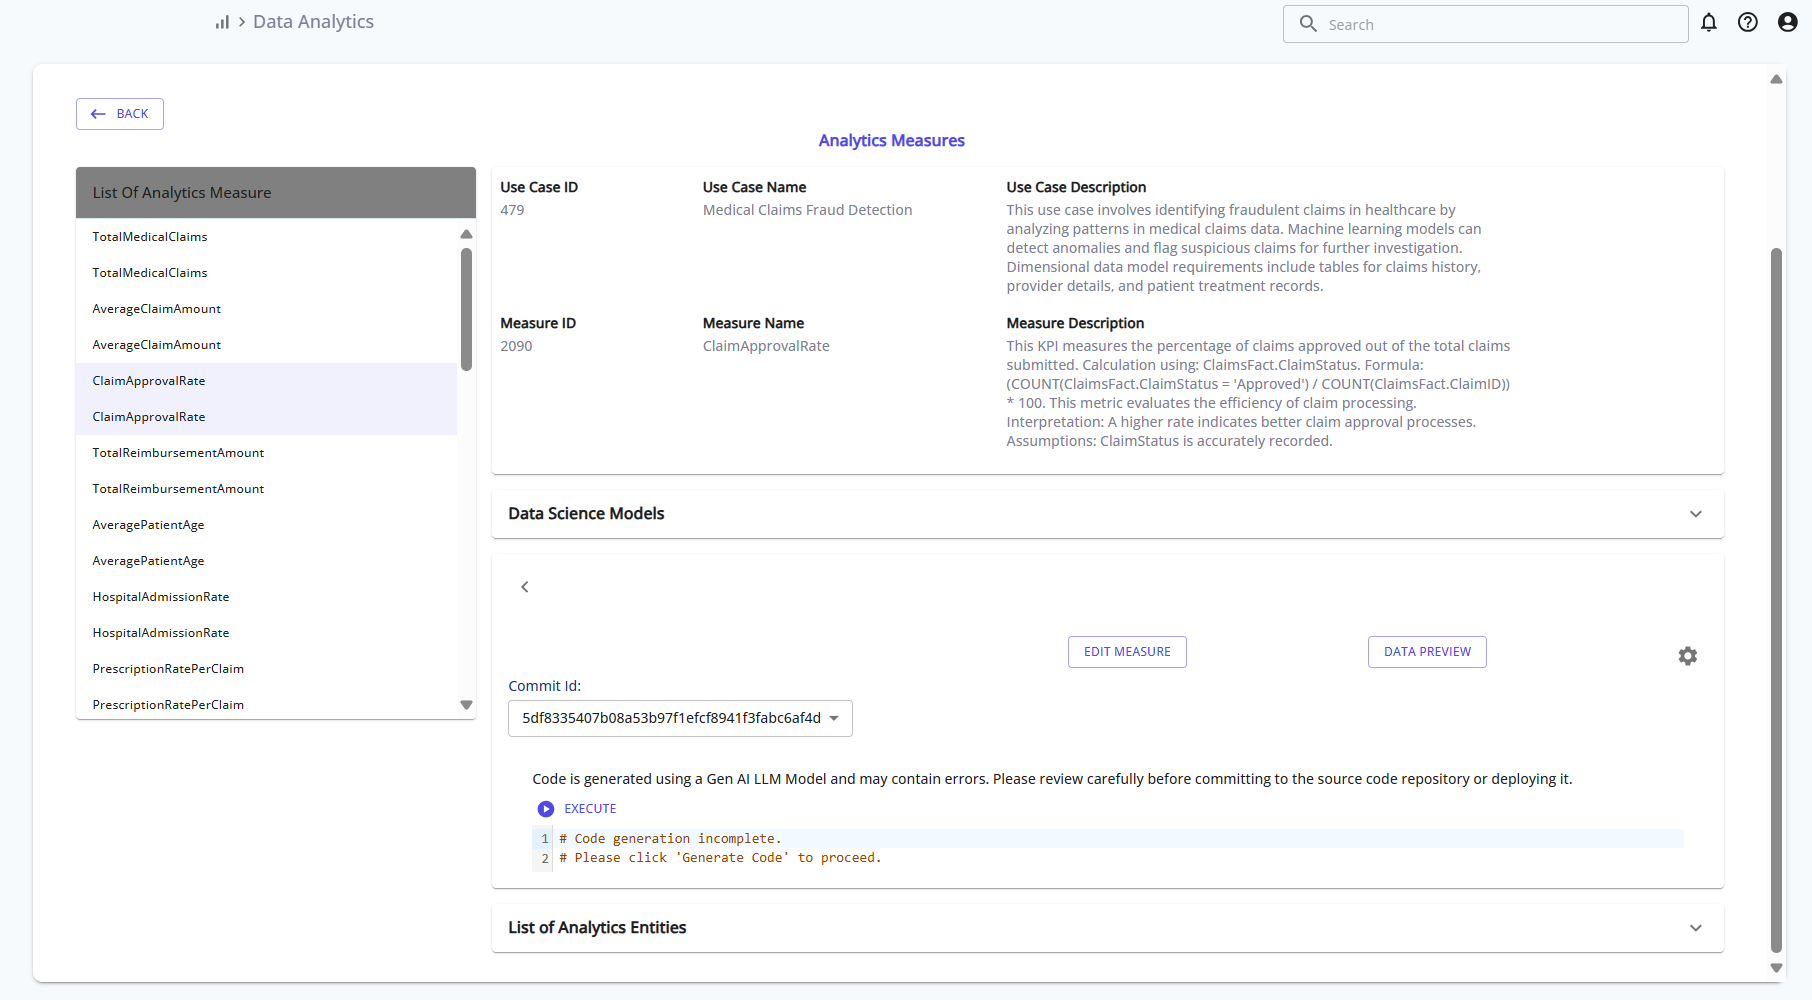
After a measure is added, you can click on it from the List of Analytics Measure panel. This opens the Analytics Measures detail view. It includes:
- Use Case metadata
- Measure metadata
- A placeholder for code generation
- Commit ID tracking
Click Edit Measure to make updates.
Reference:

Step 4: Edit, Generate Code, and Execute
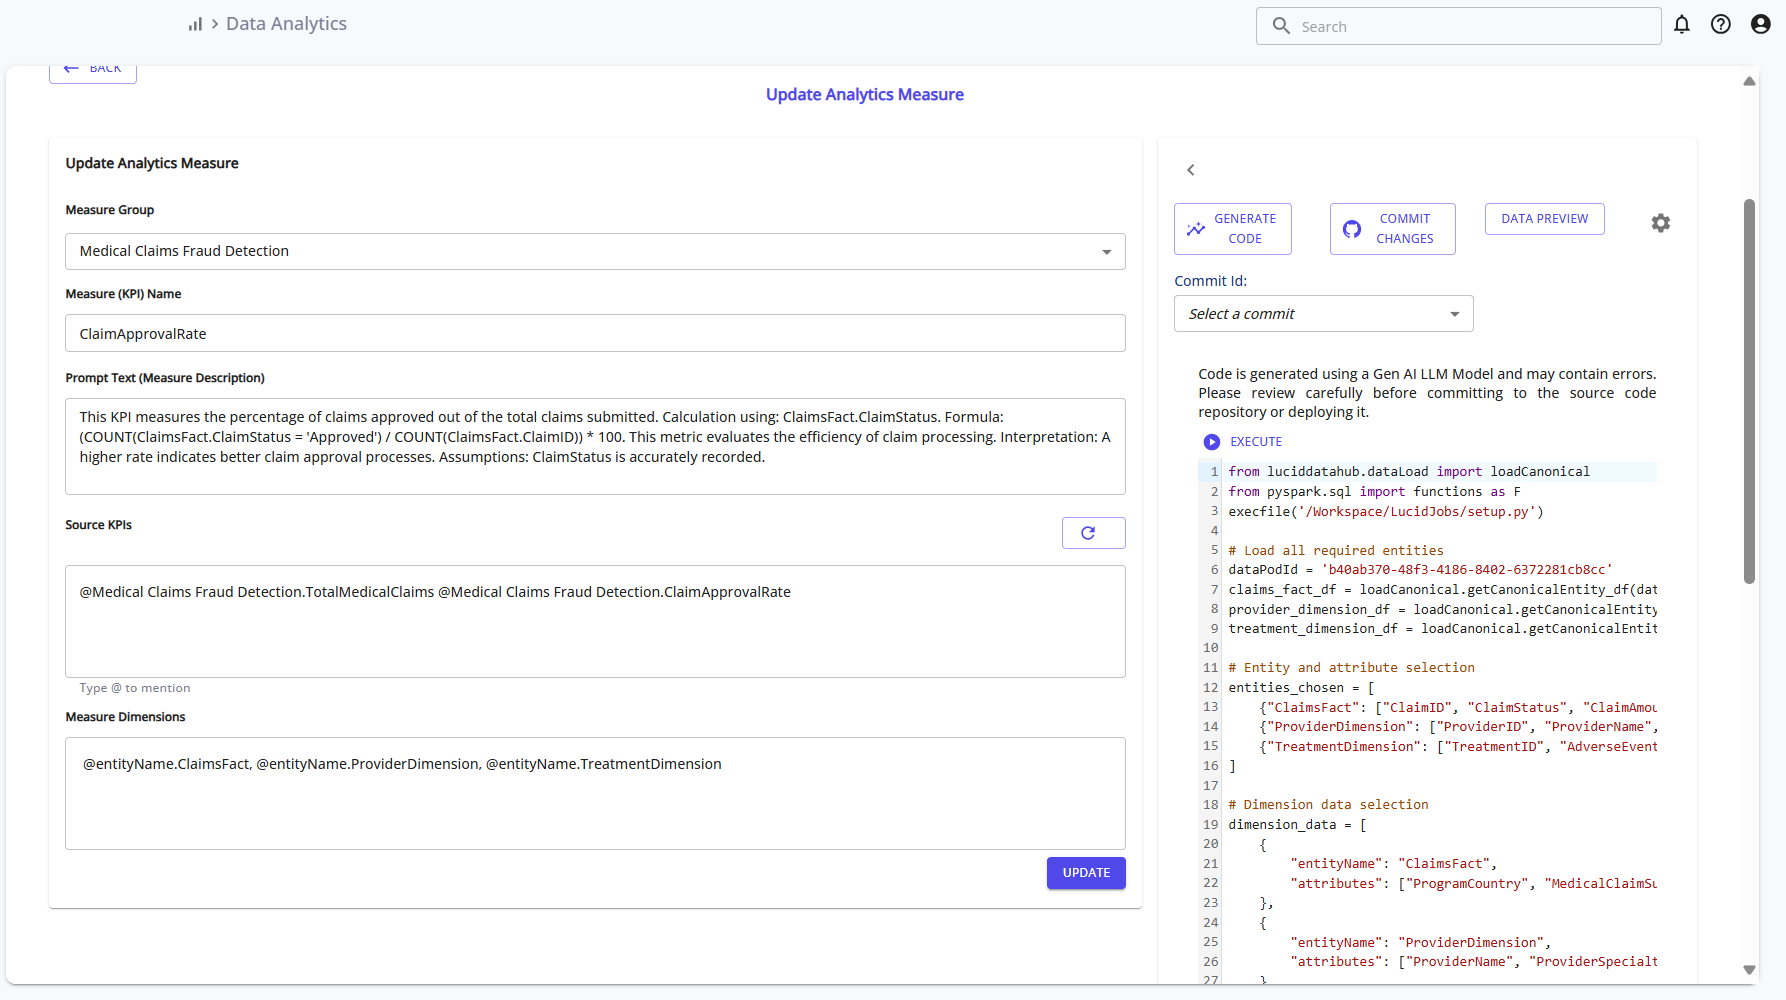
In the edit view:
- Update the Measure Group, KPI Name, and Prompt Text
- Add Source KPIs and Measure Dimensions
- Click Generate Code to produce transformation logic
- After reviewing, click Commit Changes, then Execute to process and store the KPI
This finalizes the KPI definition and makes it available for reporting.
Reference:

Summary of Steps
| Step | Action |
|---|---|
| 1 | Open the Data Analytics section |
| 2 | Select a use case and add new measures |
| 3 | View and review measure details |
| 4 | Edit, generate code, commit changes, and execute |
By completing these steps, your analytics measures are tightly linked to the enriched data models and reflect the insights required by your business use cases.