Module 1: Overview and SetUp
Creating a Data Pod
Key Terms
- DataPod: A DataPod is a virtual workspace within the Lucid Data Hub designed for data professionals to manage, integrate, and analyze data seamlessly. It acts as a container that houses all the necessary components and tools required to handle data from various sources efficiently.
- Data Domain: A Data Domain represents a specific area or category of data that is logically grouped together based on its context, usage, and relevance within an organization. It helps in organizing and managing data efficiently by categorizing it into meaningful segments.
- Examples :
- Sales: Includes data related to sales transactions, customer orders, sales forecasts, and revenue tracking.
- Finance: Covers financial data such as budgets, expenditures, financial statements, and accounting records.
- Marketing: Contains data on marketing campaigns, customer engagement, market research, and promotional activities.
- Examples :
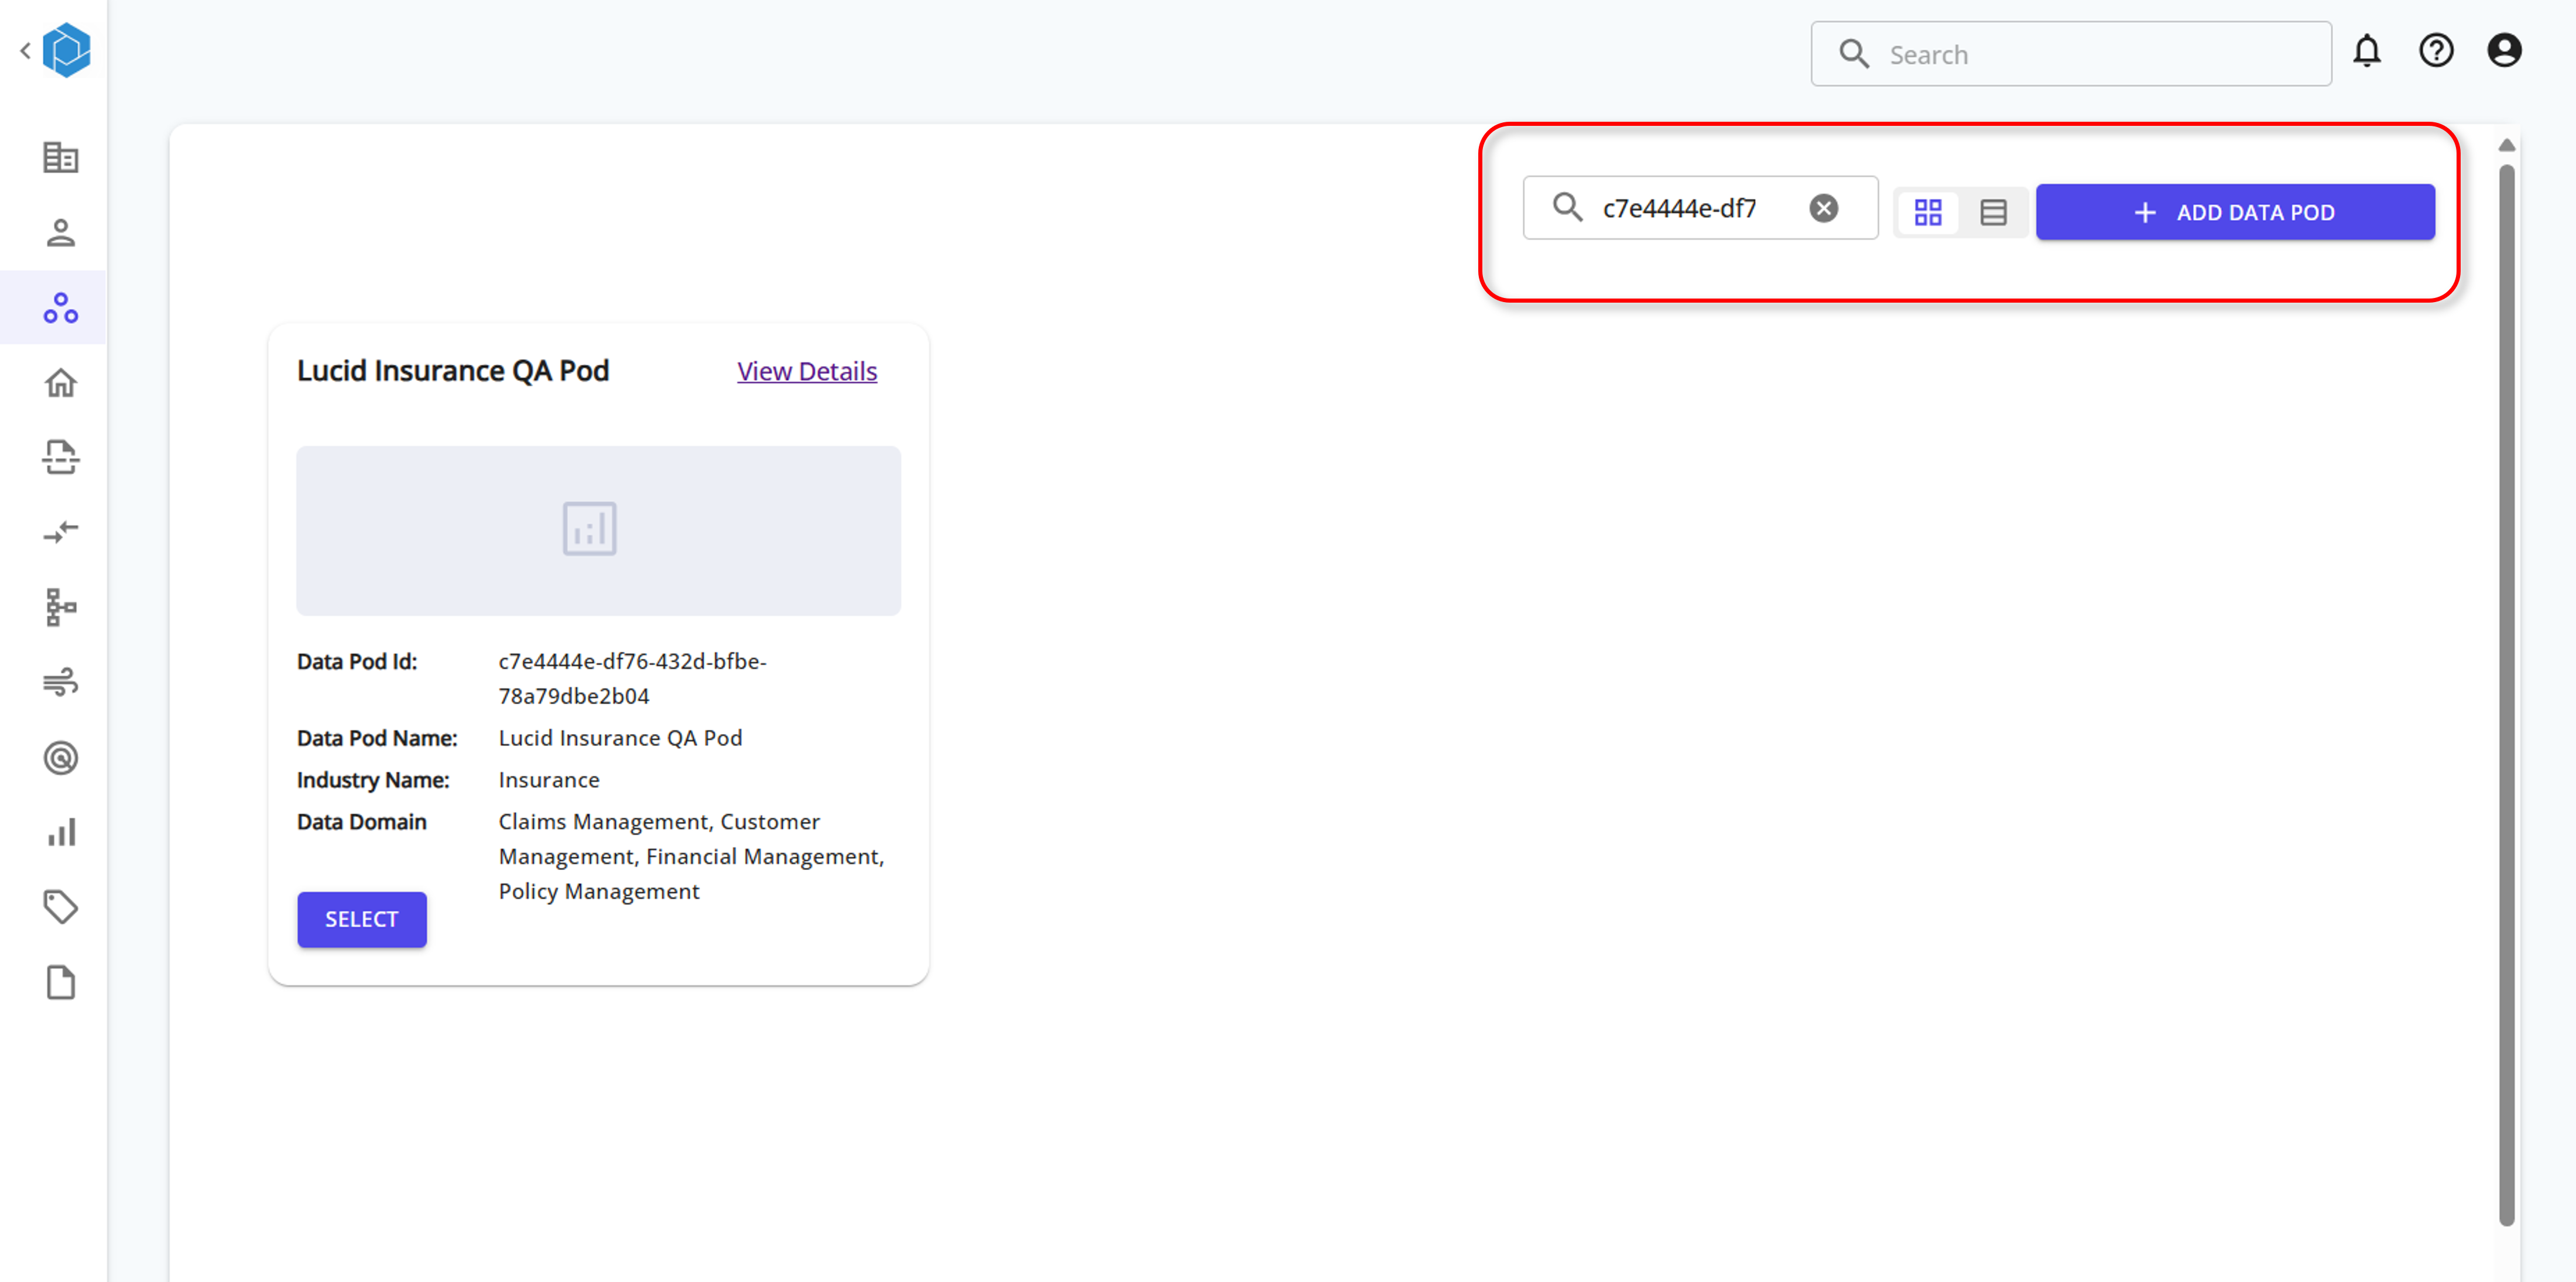
Step 1: Data Pod Details

- Navigate to Datapods Home: Click on "Datapods Home."
- Enter Name: Input the name for your Data Pod (e.g.,
Adventure_Works_Sales). - Provide Description: Write a brief description (e.g.,
Sales data for AdventureWorks 2022 database). - Select Industry: Choose the relevant industry from the dropdown (e.g.,
Production and Sales for Sports Goods). - Save and Continue: Click "Save and Continue" to proceed to the next step.
The Lucid Data Hub Data Pod provides a virtual workspace for data professionals to connect, manage, and integrate data sources seamlessly. Customize industry types, data domains, and service connections for specific data products.
Selecting or Adding a Data Domain and Generating Sample Data
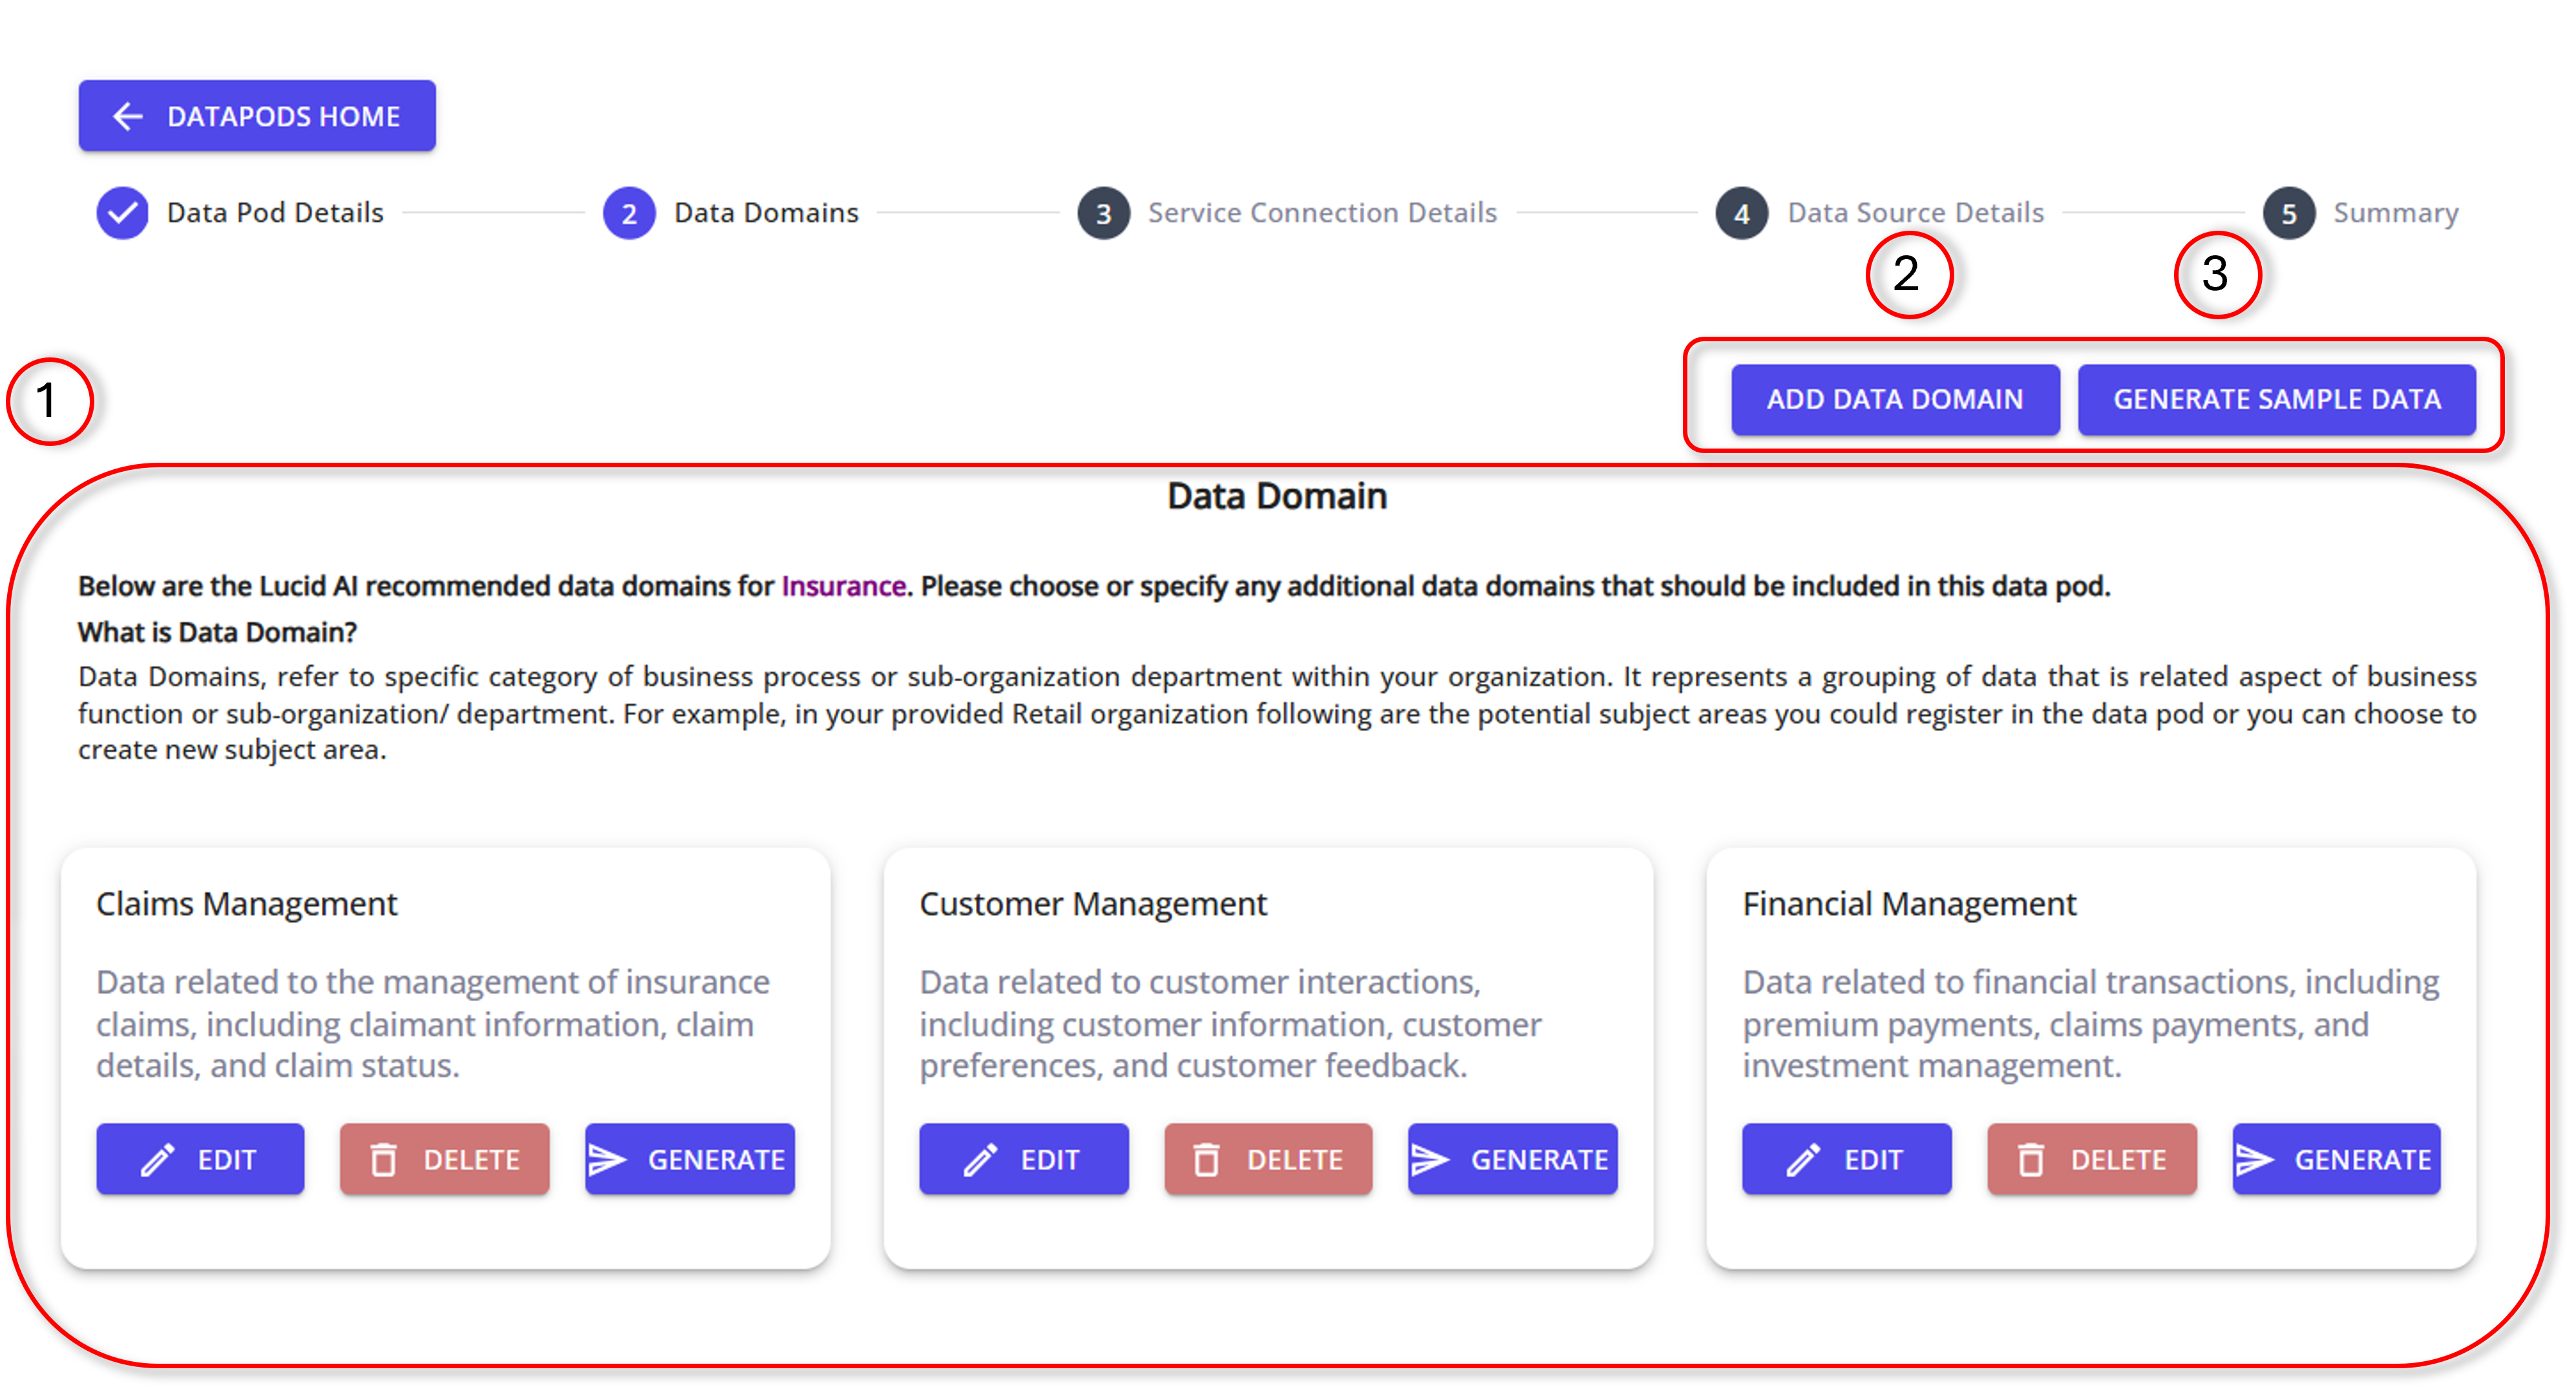
Step 2: Data Domains
- Navigate to Data Domains:
- After completing Data Pod Details, proceed to the Data Domains step.
- Select an Existing Data Domain:
- Review the recommended data domains presented.
- Click "Edit" to select and configure a recommended domain that matches your needs.
- Add a Custom Data Domain:
- Click the "Add Data Domain" button.
- Enter the name and description for the new data domain.
- Click "Save" to add the custom data domain to your Data Pod.
- Generate Sample Data:
- For each selected or custom data domain, click the "Generate Sample Data" button.
- Sample data will be added to the data domain, allowing you to test and validate your workflows.
- Save and Continue:
- Once you have selected or added your data domains and generated sample data, click "Save and Continue" to proceed to the next step.
Generating Sample Data
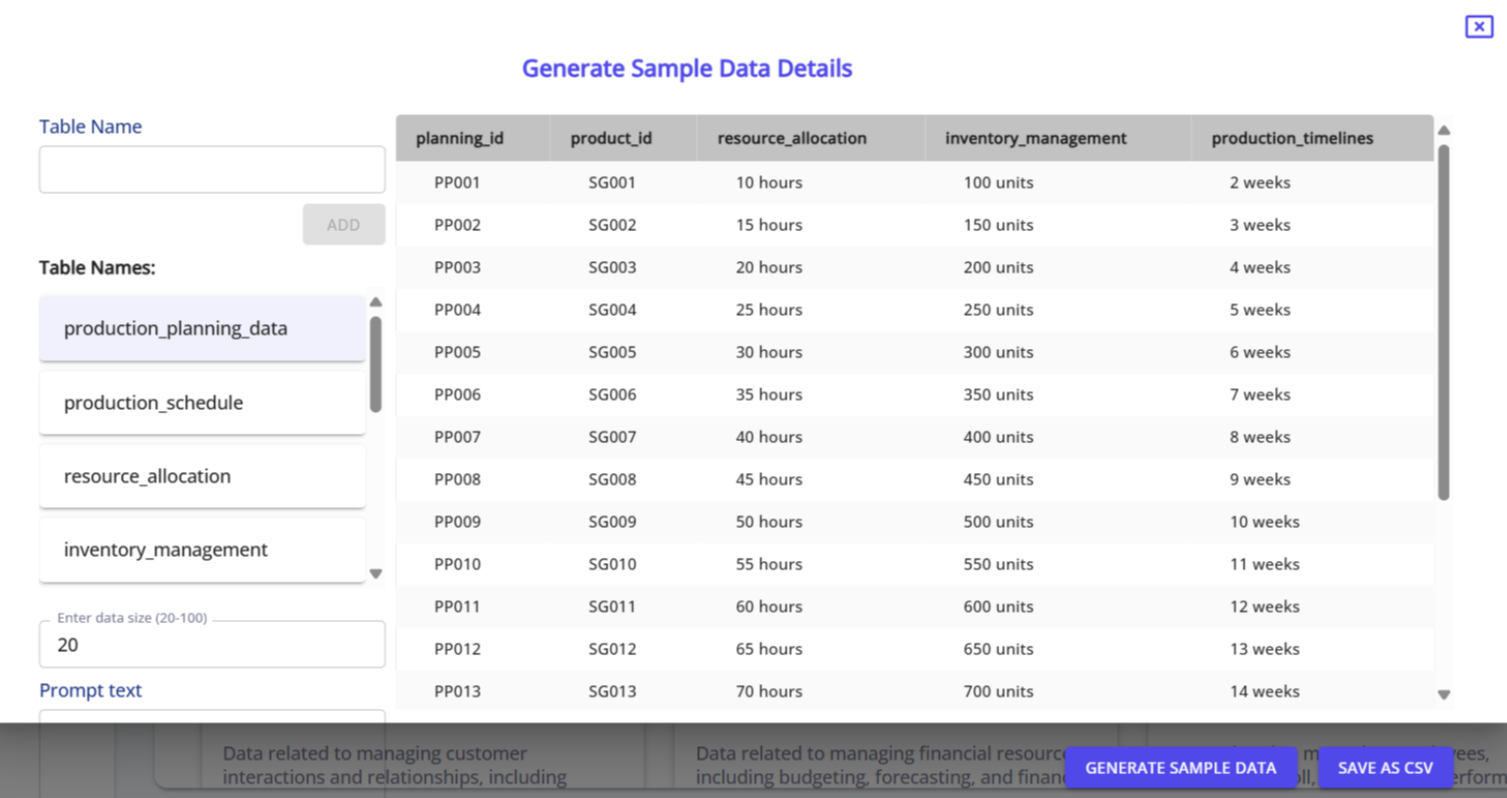
Step 3: Generate Sample Data
- Select or Create a Table:
- Select Existing Table: Choose a pre-generated table from the list (e.g.,
production_efficiency,yield_optimization). - Create Custom Table: Enter a new table name in the "Table Name" field and click "Add."
- Select Existing Table: Choose a pre-generated table from the list (e.g.,
- Specify Data Size:
- Enter the number of rows for the sample data in the "Enter data size" field (e.g., 20). The acceptable range is 20-100 rows.
- Provide Prompt Text:
- Optionally, you can enter a prompt to guide the LLM on what type of data to generate. This can help customize the sample data according to specific requirements.
- Generate Data:
- Click the "Generate" button to create sample data based on your selections and inputs.
- Review Generated Data:
- The generated data will appear in the table preview. Review it to ensure it meets your expectations.
- Save and Continue:
- Once you are satisfied with the generated sample data, click "Save and Continue" to proceed to the next step in setting up your Data Pod.
Adding Service Connection Details for a Datapod
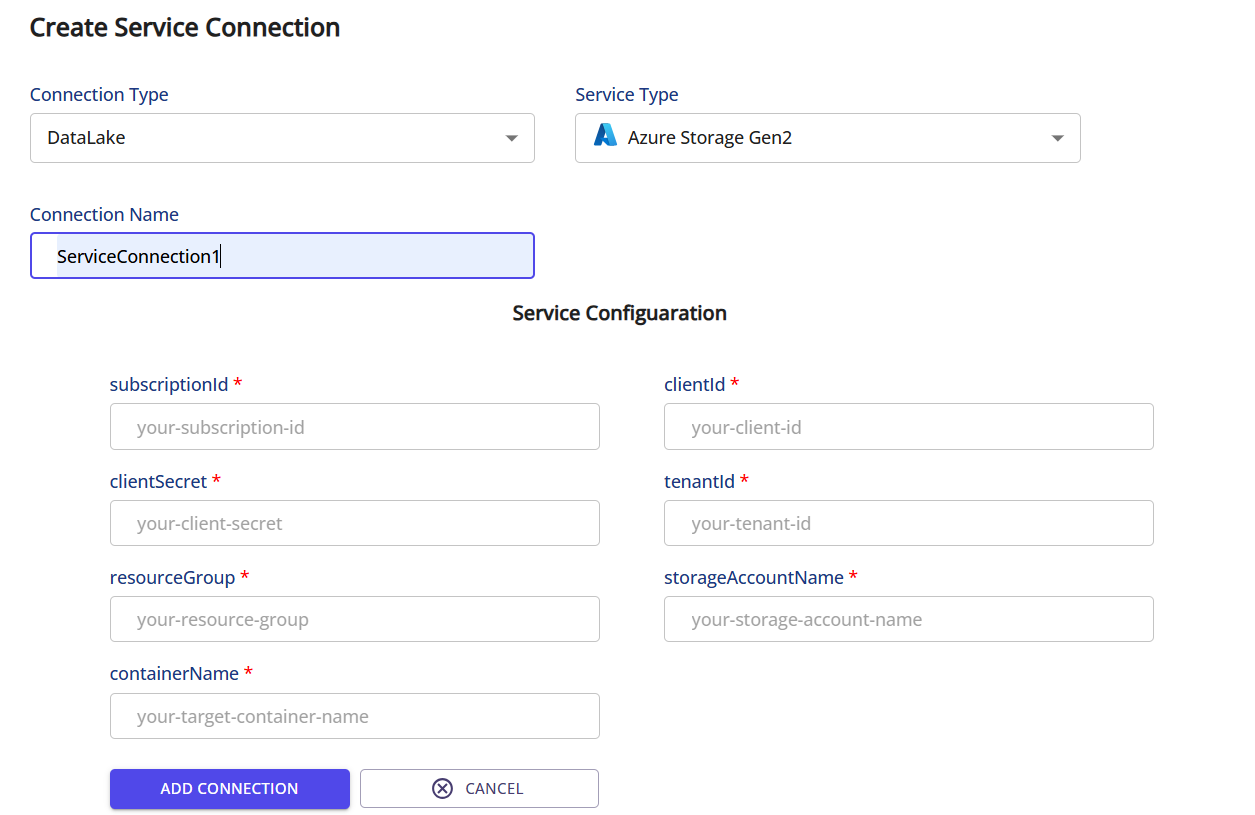
Step 4: Service Connection Details
- Add Service Connection: Click on the "Add Service Connection" button.
- Select Connection Type:
- Choose one of the following options:
- DataLake
- Data Warehouse
- Data Source
- Spark Runtime
- Choose one of the following options:
- Select Service Type:
- Choose the appropriate service type from the dropdown (e.g.,
Azure Storage Gen2).
- Choose the appropriate service type from the dropdown (e.g.,
- Enter Connection Details:
- Connection Name: Enter a name for your connection (e.g.,
ServiceConnection1). - Service Configuration:
subscriptionId: Enter your subscription ID.clientSecret: Enter your client secret.resourceGroup: Enter your resource group.containerName: Enter your target container name.clientId: Enter your client ID.tenantId: Enter your tenant ID.storageAccountName: Enter your storage account name.
- Connection Name: Enter a name for your connection (e.g.,
- Add Connection:
- Click "Add Connection" to save the service connection details.
- Save and Continue:
- Once the connection is added, click "Save and Continue" to proceed to the next step.
Creating a Data Source
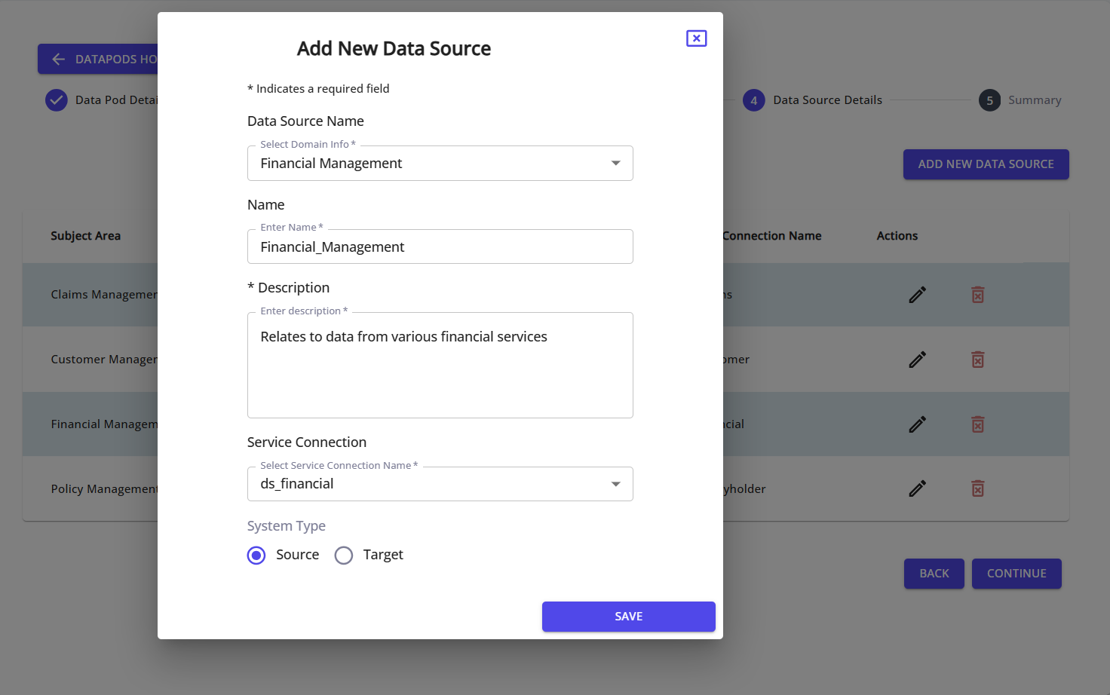
Step 5: Data Source Details
- Add New Data Source: Click on the "Add New Data Source" button.
- Enter Data Source Information:
- Data Source Name: Select the relevant data domain from the dropdown.
- Name: Enter a name for your data source (e.g.,
Finance_System_AorFinance_System_B). - Description: Provide a brief description of the data source (e.g.,
Financial data from System AorFinancial data from System B).
- Select Service Connection:
- Choose the appropriate service connection name from the dropdown that you created earlier (e.g.,
Connection_AorConnection_B).
- Choose the appropriate service connection name from the dropdown that you created earlier (e.g.,
- Select System Type:
- Choose
Sourceas the system type.
- Choose
- Save the Data Source:
- Click "Save" to add the new data source.
- Review and Confirm:
- Review the newly added data source in the list. Ensure that all details are correct.
- Save and Continue:
- Once the data source is added and reviewed, click "Save and Continue" to proceed to the summary or next step.
Summary: Reviewing Details and Managing Access

Step 6: Summary
- Review Data Pod Details:
- Data Pod Name: Ensure the name is correct (e.g.,
Demo Oil Pod Lucid). - Description: Verify the description (e.g.,
Lucid Oil Fabric Demo). - Data Pod ID: Confirm the unique ID.
- Industry: Ensure the correct industry is selected (e.g.,
Oil Refining). - Data Pod Type: Verify the type (e.g.,
Generative Lakehouse).
- Data Pod Name: Ensure the name is correct (e.g.,
- Review Data Domains:
- Check the list of selected data domains to ensure they are accurate and relevant to your needs.
- Review Service Connections:
- Confirm that all service connections are properly configured and connected.
- Review Data Sources:
- Verify the data sources, their names, descriptions, and corresponding service connections.
Step 7: Managing Access
- Assign Access:
- Click on the "Manage Access" button to assign access to users.
- Add New Users:
- Click on "+ Assign Access" to add new users.
- Enter the user's email address and select their role (e.g., Data Architect).
- Edit or Remove Users:
- Use the "Edit" icon to modify user roles or details.
- Use the "Delete" icon to remove users from the access list.
- Review Access List:
- Ensure the list of users with access to the Data Pod is correct. Each user’s email and role should be accurately displayed.